

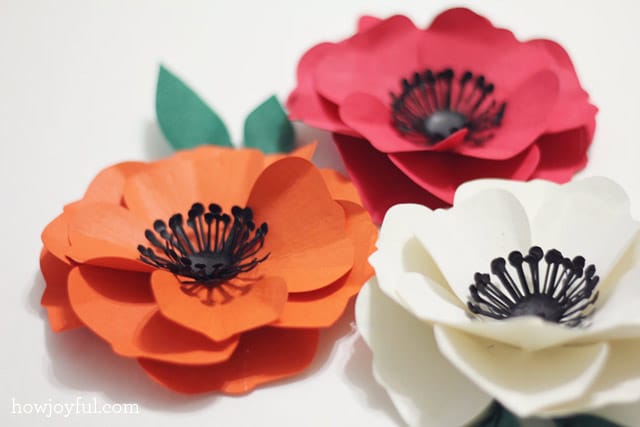
I've been having way too much fun experimenting with my new cutting machine, making all kinds of paper flowers. So today I am going to share the pattern files and the instructions on how to make one of my favorite ones, a poppy flower =]

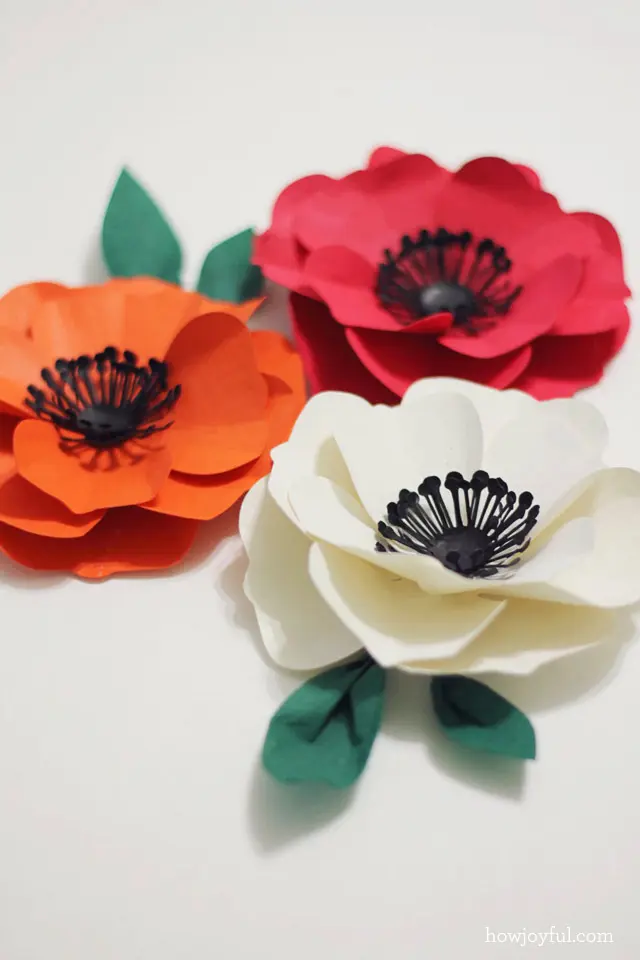
I actually made this one in red, orange, and white, of all the flowers I made ended up being one of the easiest to assemble, and since with a cutting machine you can forget about the x-acto and the endless cutting, the assembly part is all that we have to worry about.


List of materials
- Cutting machine
- Card-stock or any kind of paper you'd like to make your flowers with
- Embossing tool or Fondant tools
- Glue or glue gun to attach all your pieces
- A cork tile or any soft surface
⇊ Scroll all the way to the bottom to download the pattern ⇊
INSTRUCTIONS
First, you have to cut all the pieces for your flower, you will need 3 body pieces (all included in the downloadable file) and 3 center-pieces (I set them in separate files because you want them in different paper colors) I actually tried to fit as many center-pieces as I could in one page by just copy/pasting.
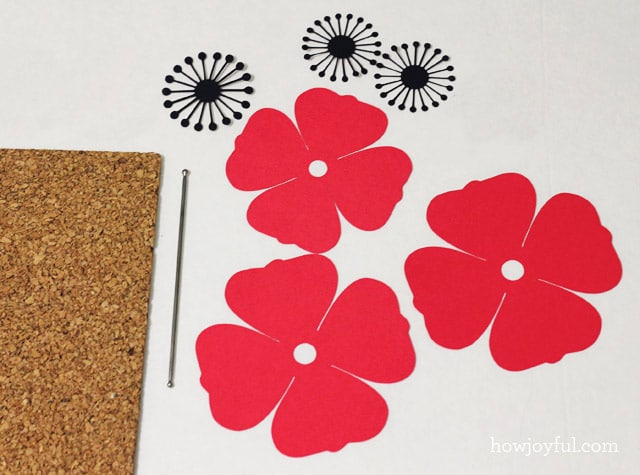

Using the embossing or fondant tool put pressure on the edges of the center-piece, remember to use a cork tile or a soft surface, otherwise, if the card-stock is thick it will be hard to shape.


Once you are done with the out part, gently do a circular motion on the center, this will lift the edges without the need to fold them in.


For the petals, I actually just applied a lot of pressure on the center first and then move to the edges. if your paper looks like its going to rip, just fold the petal in half and then apply pressure on the rest of the petal. This happened to me with the first paper I tried and after folding it never happened again =]


Repeat for all the rest of the petals and also fold the petals inwards that way it will give them more volume before gluing everything together.


Assemble putting the small centerpiece first then the two bigger centerpieces, then the small body of petals followed by the two big petals, make sure to rotate the petals so that the flower looks fuller. And you are done!!


List of materials
- Cutting machine
- Card-stock or any kind of paper you'd like to make your flowers with
- Embossing tool or Fondant tools
- Glue or glue gun to attach all your pieces
- A cork tile or any soft surface
The pattern is a PDF file, the link goes directly to Dropbox, but you don't need an account to view it, you will need Adobe Reader or a similar program once the file is downloaded.
I added some pieces of green napkins rolled at the ends to make it look like leaves =] I hope you guys enjoy and make sure to come back for more flower tutorials!
PS. Because you guys emailed me so many times requesting a PDF format, I've added that instead of the cutting file, Enjoy!
Happy Thanksgiving!!
Brenda Williams
Sunday 29th of November 2020
Thank you for sharing. Every Christmas, I like to do a small tribute to the soldiers and veterans on my front door. This year, I thought a cluster or string of poppies would be nice. Thanks so much for the files.
claudia
Wednesday 30th of April 2014
Hi! I loved this. Thanks so much.
Patti
Monday 28th of April 2014
Hi Joy! Thank you SO much for sharing this wonderful tutorial for the paper poppies. I have a Silhouette and cannot wait to make these. However I am unable to download your pattern for the body or the center. Would you please email them to me? And I think a PDF would be great, for those who don't have a Silhouette, or would prefer to use the different method. Thanks so much for sharing your time and talent with us. You are one awesome girl!!!
Liz O.
Saturday 30th of November 2013
Beautiful poppies Joy! I wish I had a Silhouette!
Thanks for sharing. Have a wonderful weekend!
Stacia
Friday 29th of November 2013
The poppies are wonderful! Thank you for sharing!!