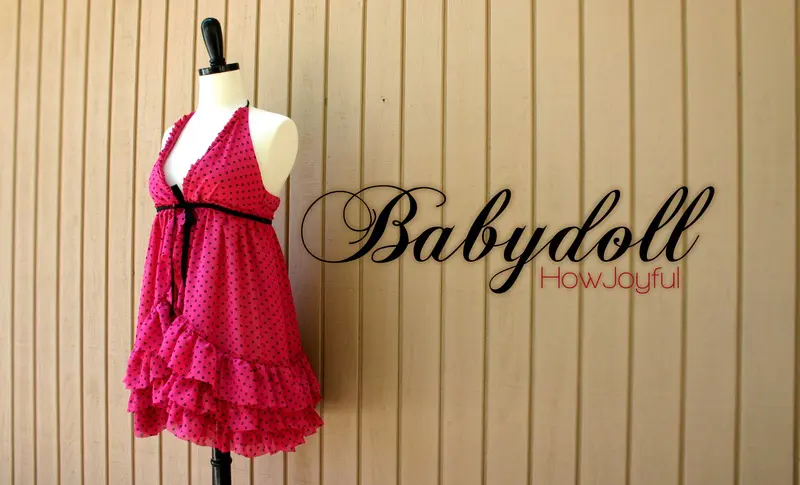
Check how I made this DIY babydoll nightie from leftover chiffon fabric in Polkadot print and a little ribbon. This is a simple poject since all you have to do is burn the edges of the chiffon in order to have it not fray. But make sure that it's not a 100% natural chiffon, because it has to have a little blend of polyester in order to achieve the edge you want.

Last week I show you all the Babydoll I made for our honeymoon, since I already made it and didn't take pictures of the process, this time I draw the steps as clear as I could, hopefully, you will all understand, but if not I will try to make another one, after all, I can always use some extra of this :)
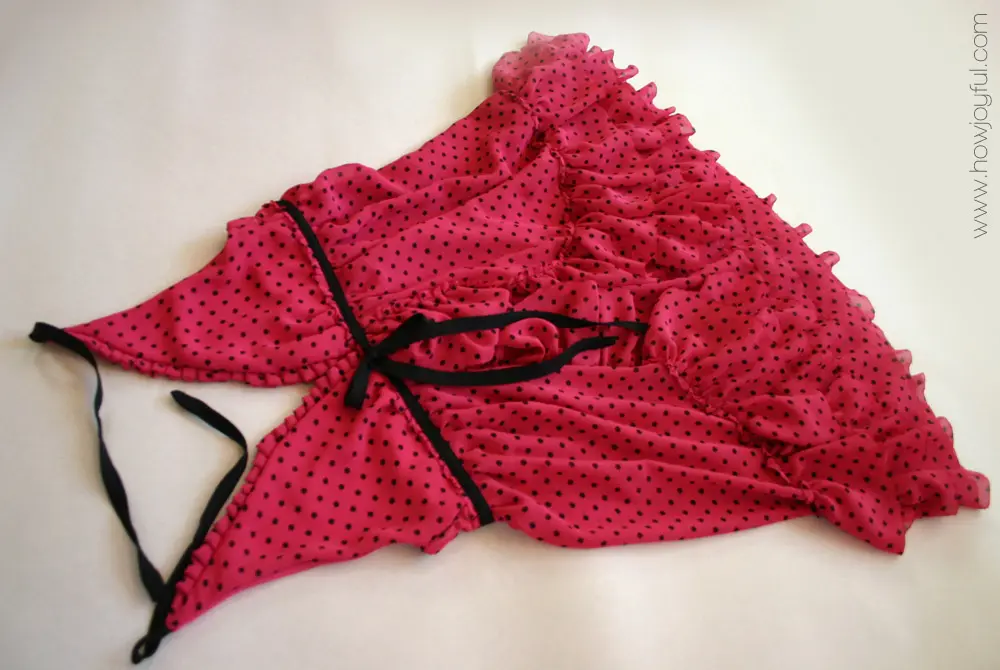
I made this out of leftover chiffon and black ribbon, I burn the edges of all pieces carefully to prevent fraying – But be careful sometimes if it gets too burn you end up with a solid hard edge, not nice!

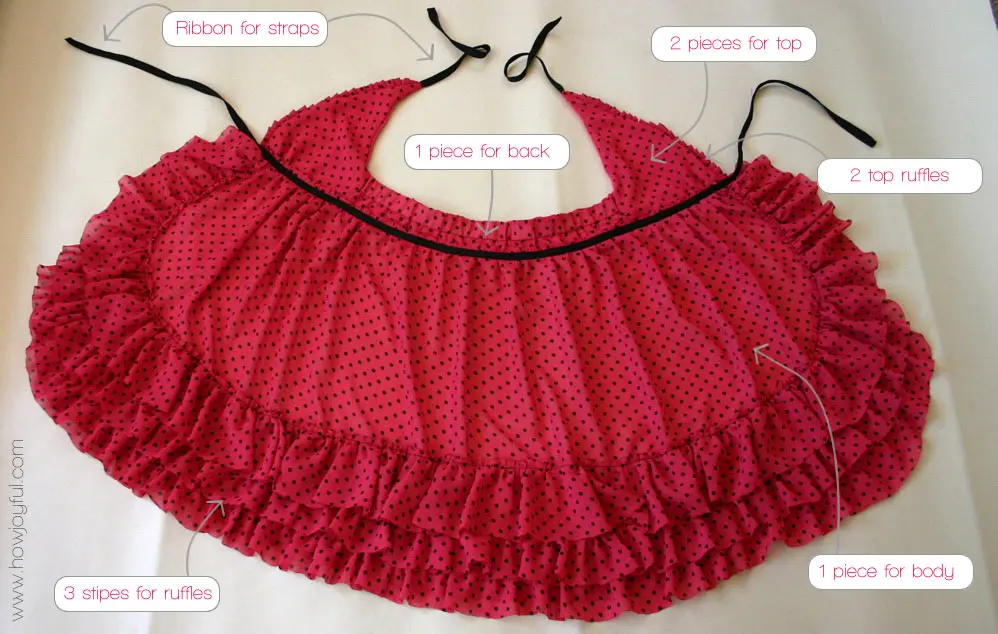
The parts
These are all the pieces you need to make it. The size of each piece will depend on the size of the final piece. With the most important measurement being the size of the back piece that will go all around below the bust.
- Ribbon for the straps
- One long piece for the back
- Two triangle pieces for the front
- two thin pieces for the small ruffles on the top
- One big piece as long as you want for the bottom body
- Three long strips to make the ruffles around the body piece

The process
This is a simple project, and almost completely based on the top of a simple triangle bikini. So if you don't have one, get something as similar to it as possible and alter it to match the shapes I suggest.
1 Making the top of the DIY babydoll nightie.
In order to make sure that the babydoll fits well, I used the measurements of a bikini top. We are basically copying the shape and the measurements of a simple triangle bikini.
- Measure your favorite bikini top
- Cut 2 pieces of your fabric of choice for the front and also 2 pieces that will reinforce the back. You can choose either the same kind of fabric or something different.
- Cut two strips that are double the side of your bikini triangle, as it's pointed in the graphic below.
- Fold them in half and hand stitch the edge, you are making a small ruffle, so make sure that you gather the piece until it's the same length as the triangle of the bikini.
- Add a strap on top and then add your back piece on top. As suggested by the graphic.
- Sew both long sides of the bikini-shaped pieces, after that turn them inside out, repeat the process to make the other side.


2 Making the bottom of the DIY babydoll nightie.
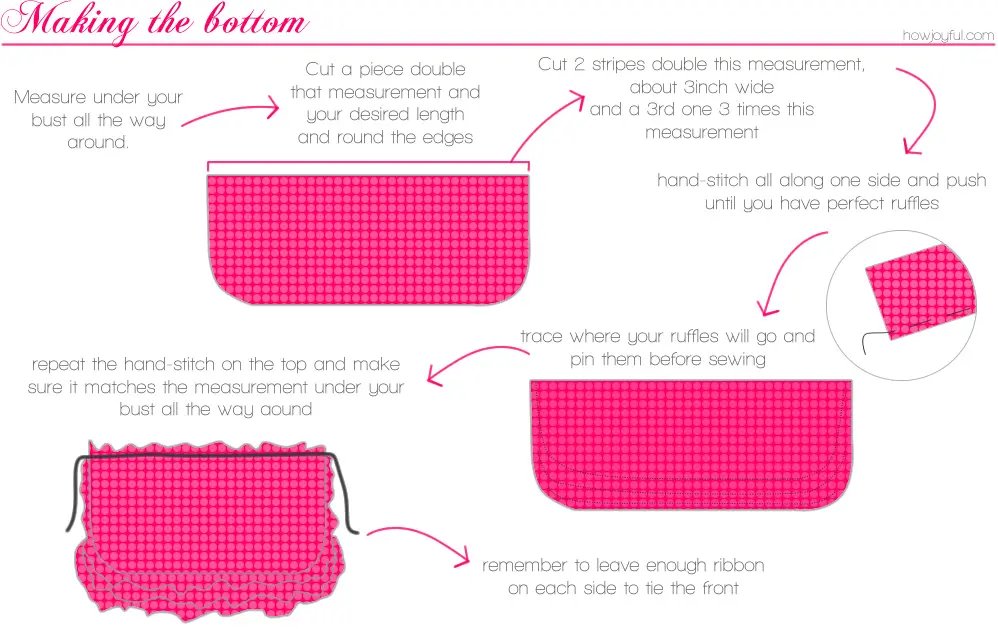
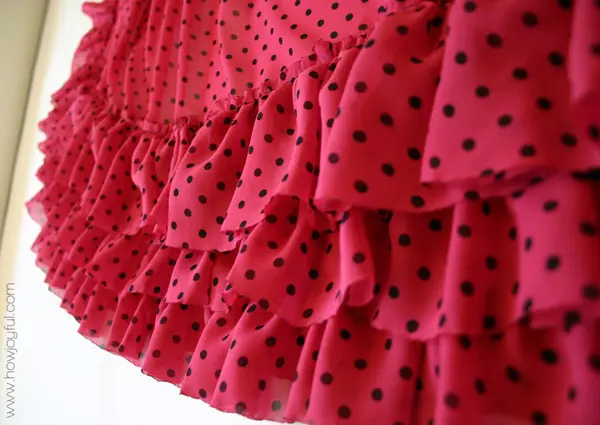
The bottom piece of the babydoll is a one piece that we will make cute by cutting the edges and adding the ruffles.
- Measure under your bust all the way around.
- Cut a piece that is double the measure you took. Cut it at your desire length from the bust down.
- Cut two stripes that are double this length, or 4 times the first measurement.
- Hand stitch all along one side and push through until you have a perfect ruffle.
- Trace where your ruffles will go and pin them before sewing to make sure they are exactly where you want them.
- Repeat the stitching at the top of the bottom piece to make sure that piece is the same size as your first measurement, so that it fits right below your bust.

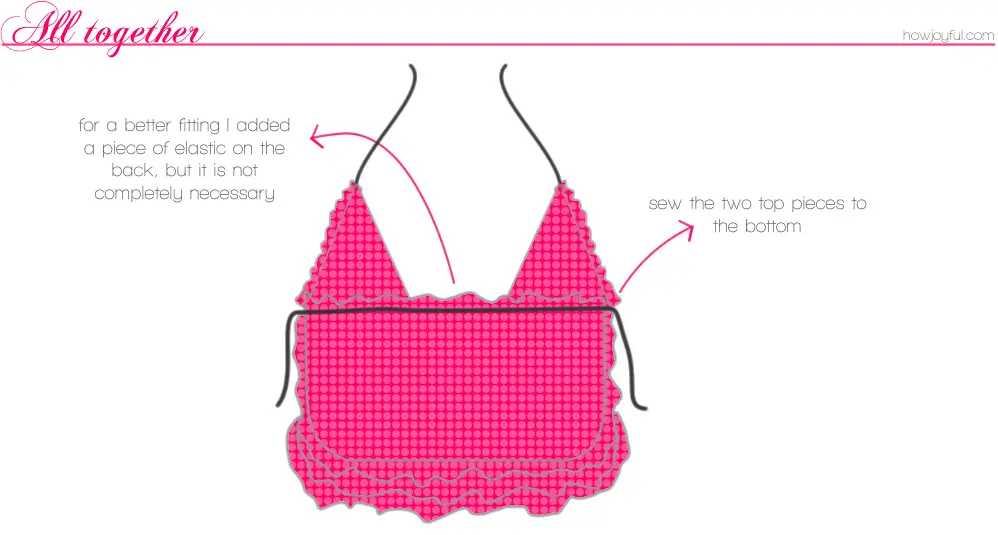
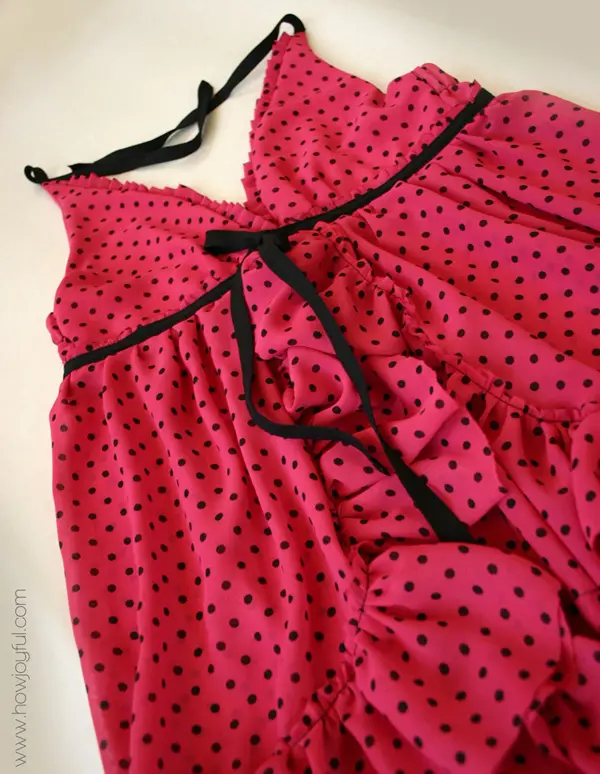
3 Putting the DIY babydoll nightie together.
Putting both pieces together is very simple. For a better fit I added a small piece of elastic on the back, but this is not 100% necessary, it just makes it a little more comfortable.
Just sew both pieces together with a topsticth and you are done! You can tie the top and the front, adjusting to your desired length.

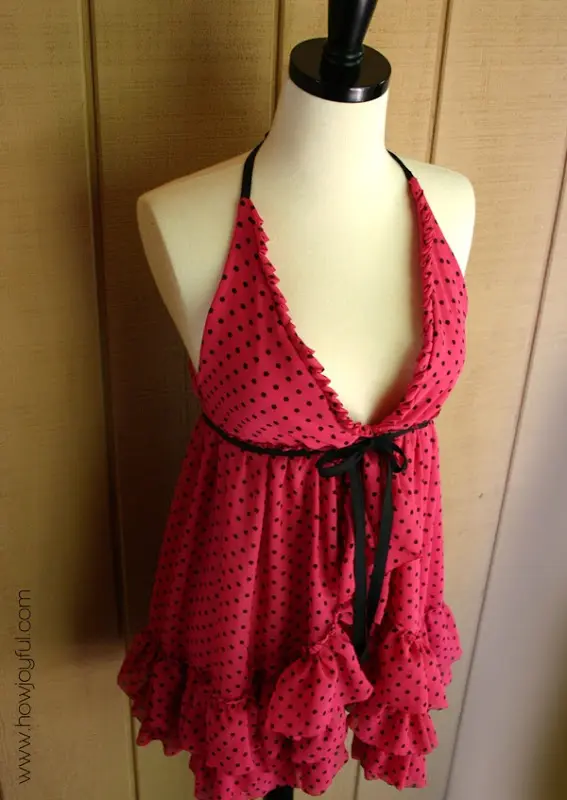
The DIY babydoll nightie
I love how this looks and it's surprisingly comfortable! I also made matching underwear on the same fabric just by coping the bottom of the same swimsuit I used to make the top piece.


I hope you like this little sewing project, it was so fun for me to make! I am hoping to make another, but I need to get more fabric.
If you make it I would love to see, so just send me a message!
Have lovely day.
susie
Sunday 24th of January 2016
I love this tutorial! Do you know about how many yards you used of the chiffon?
Debbie
Thursday 8th of January 2015
I'd love yo have a go at this but also can't see the back pattern piece on the 'how-to'. Can you please explain ? Thanks!
Deb
Monday 8th of September 2014
I have a post scheduled in a week or so sharing this design! I am linking back to this page. :) Its so pretty and looks really easy. Hopefully I'll get to make this the next time I buy fabric. Love it!
kayla valley
Friday 8th of November 2013
Hi joy, I love this pattern and am currently cutting the pieces. I'm kind of new to sewing so forgive me if this is a dumb question but why does the bottom part need to be 2ce the length of your bust measurement? I've been staring at the pattern and can't figure it out. I greatly appreciate the help :)
Gayatri karki
Saturday 16th of February 2013
wow! it is too pretty but not easy to make. Thank you so much joy, for sharing great tutorial.