


If you are like me, chances are you have a full bin of fabric scraps! So today I want to share a cute project to get rid of your scraps of fabric! A Four strand braided bracelet!


I love braids, but going from a 3 strand braid to a 4 strand braid can be a little complicated at first. So today I wanted to share my favorite way to make a simple and budget-friendly bracelet with your favorite fabric.
I love bracelets and I am always looking for bright colors and unique looking bracelets, so last time I visited Joann's I bought 6/8″ ribbon ends and lobster clasps to make fabric bracelets.
This is such a perfect way to use your fabric scraps and make some lovely presents or just some extra pieces to add to your wardrobe!
MATERIALS
- Fabric scraps
- Ribbon ends
- Lobster clasp
- Cord (in case your fabric is not thick enough)
- Scissors or Mat and rotary cutter
- Sewing machine or hand stitching
Making the strands
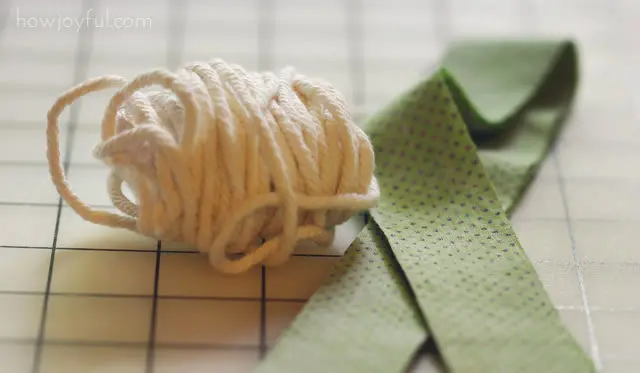
I also wanted to share that this tutorial is for very light-weight fabrics, since I didn't have much of it, I could not just roll 4 big pieces and make the braid, instead I made little straps and run pieces of cord on the inside to give them volume. I also made others with old T-shirts and for those you will just need to jump to the braid step once you have your 4 strands.

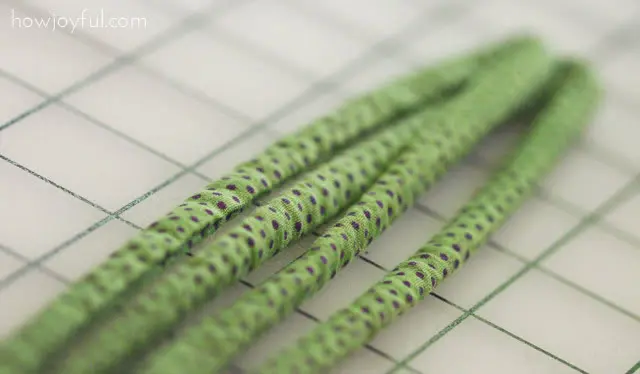
First I cut 2″ wide of my fabric. To determine the length you will need I always measure my wrist kind of loose, then add 1/2 of that measurement.


After that I folded the traps with the wrong side of the fabric facing out and sewed them, you can see the details of how to turn the straps inside out here


Then I added attached a clothespin to the end of my cord and carefully run it trough the inside of the trap. I decided to make one very long strap and then divide it in 4 to braid my bracelet.


Braiding the four strands
In order to show you in a better way how to make the strand, I am using 4 different colors, so you can see exactly what strand goes where.
Start with attaching the four strands together, either make a knot or use something to hold them while you braid.

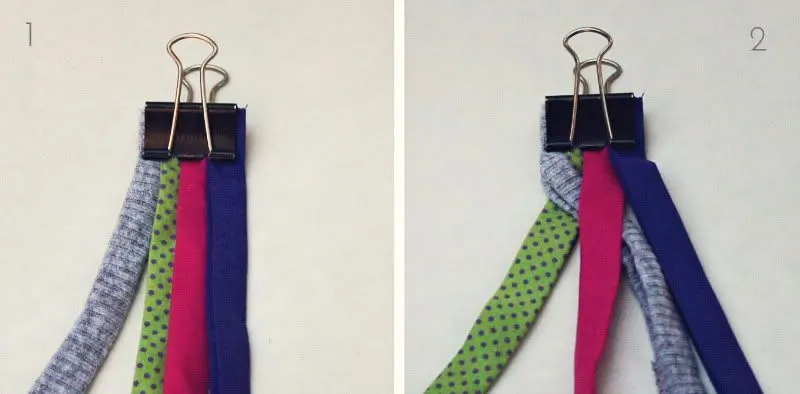
1– hold your four strains straight together
2– turn the gray strain below the green and above the pink.

3– move the blue under the gray and above the pink
4– once again move the border-left in this case green, on top of the blue.

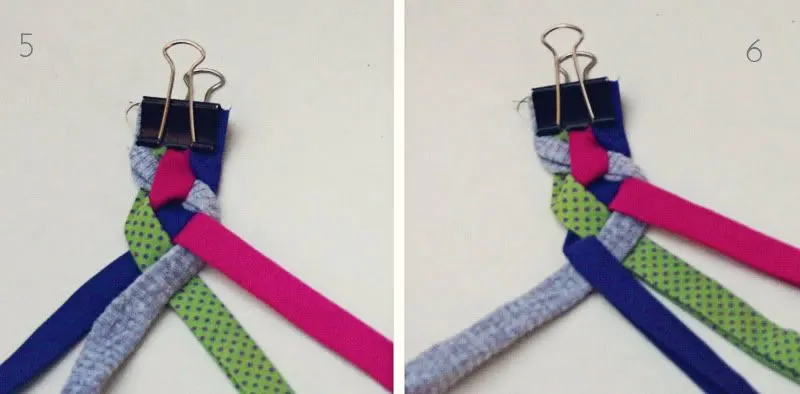
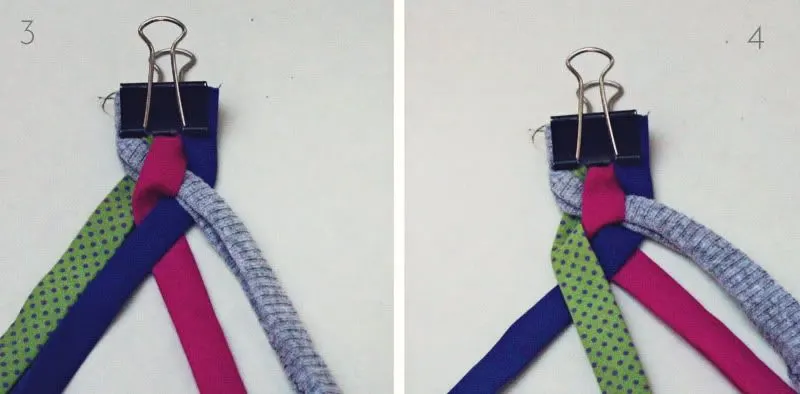
5– move the right one (gray) under the pink and on top of the green.
6– grab the blue and place it on top of the gray.


7– move the pink under the green and on top of the blue.
8– repeat the moves and keep going =]

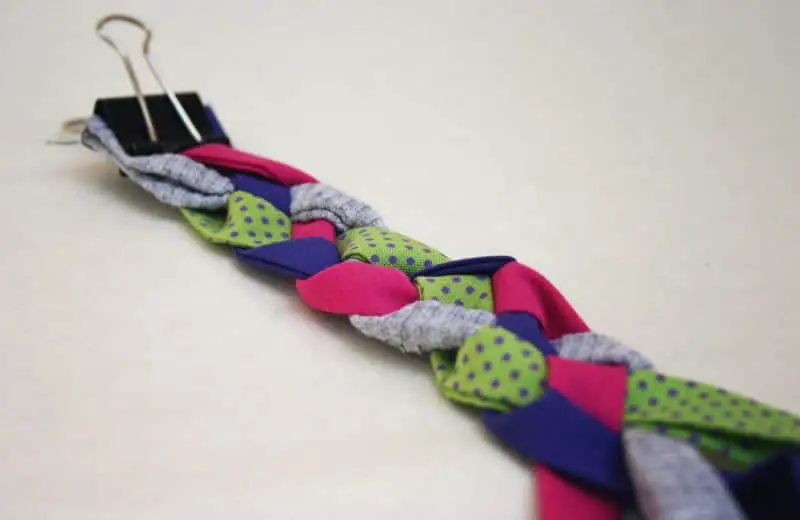
And your strand is all ready! I just went ahead and braided the strands I already made for my bracelet and now all we have left to do is attach the clasp!
Attaching the clasp
After you have your piece braided you will just need to add the ribbon ends very carefully, since I folded my 2 strands in the top I had a clean end on one side and I just worried about the other end.


I secured one side first pushed the rest of the braid to the center of the ribbon end and then close the other side. I also add the lobster clasp and my bracelet was ready to be rocked!!


The reveal
Now it's just time to contemplate your beautiful bracelet! I love this project to get rid of fabric scraps and to make cute handmade presents for my friends! I love you like it as well! Now it's time for a full reveal!


What is really cool is that you can pretty much make this out of any kind of fabric, rope, leather, anything! and using different colors strands it gives it a very cool look too =]
Have a wonderful day!
* This tutorial and pattern are provided for personal, non-commercial use only.
Check the Site policy at the bottom for further information, thank you!
onepagerapp.com
Monday 12th of October 2015
With free Wi-Fi available and prolonged vacatioon hrs, we are the perfect destination for an afternoon of searching for friendds aand family.
Also visit my page ... Chicago home furnishings (onepagerapp.com)
Rado
Thursday 8th of January 2015
With your photos and description is bracelet very easy to make. Thanks for it.
3K Moda
Wednesday 26th of February 2014
So want to try this , i love this very nice thanks!
m
Thursday 15th of August 2013
Hi there, Thanks for sharing this wonderful bracelet idea. I have made a couple of these and when I go back to work next week I expect people will be asking me about them ... thank you :)
x
Zuleide Angelica Barbosa
Tuesday 30th of July 2013
Vo u tentar fazer.Não garanto,falta-me coordenação,mas achei linda! Bjs