Check the instructions for this DIY mouse pad made out of fabric scraps and shelve liner for an antislip grip and with a coat of ModPodge to make it ultra-durable! Make it in any fabric you want! Super cute and customizable.


After I made my chair cover, I wanted my desk to have some of that fabric as well and since I had a bunch of scraps I decided to make a mouse pad (I really needed one too) I also wanted to give my brand new ModPodge a try even though the one that I have it's not the one the recommended for fabric.


I wanted to wait a while in order to write this post to see how it worked first, it's been more than 3 months and it holds the shape and works perfectly, so now that passed the test of time I can share it =]


It was actually pretty simple and if it wasn't for the dry time of the ModPodge it could be done easily in less than 15 minutes.
The materials for the DIY mouse pad
- Your fabric of choice in the size you want your mousepad
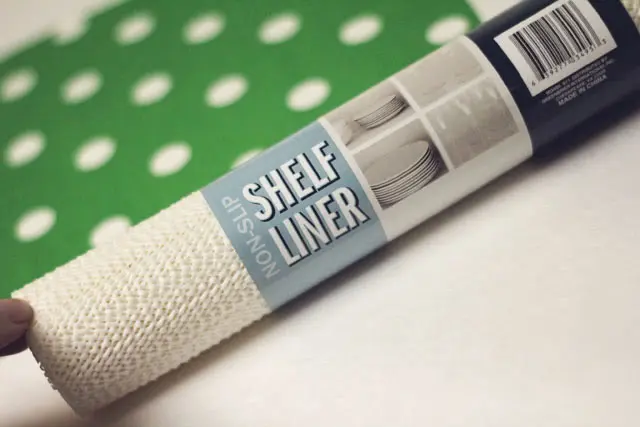
- A 1 inch bigger than your fabric piece of non-slip shelf liner
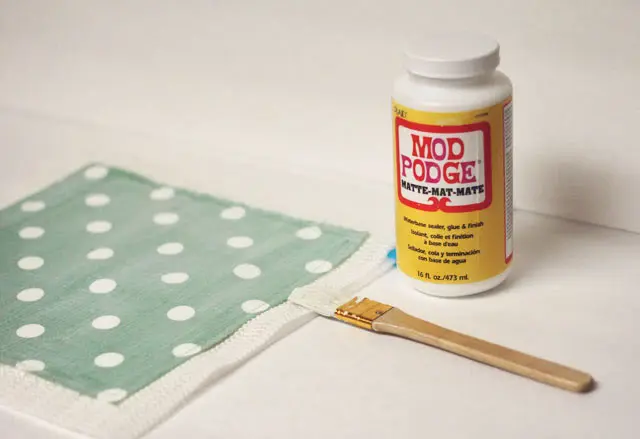
- Modpodge
- Paper towel
- A small brush or sponge brush
- Sewing machine, or hand stitching

The process
Before we get started, remember to pre-wash the fabric you are going to use because it can shrink after you get it wet with the ModPodge.
– Cut your fabric in the size you want your mousepad (mine is a 10×10 inch piece), you can get all creative and try different shapes, I just did a square because I don't have much space in my desk right now and my square fits perfect!


– After you have your fabric, cut a bigger piece of the shelf liner and pin it in place, add a paper towel in the bottom, that way the shelf liner will be in between the fabric and the paper towel to be able to sew it. Otherwise, it will get stuck to the foot of the sewing machine if you plan to hand-stitch it, dismiss the paper towel =]
– Sew your mousepad carefully around the edge making sure the fabric and mat do not move


– After you are done sewing, pull the paper towel carefully away from the sewing line (right picture above) after you do all of the edges the center portion will come out very easily.
– Grab a brush and cover the fabric in a thin layer of Modpodge, if you don't have Modpodge you can use tacky glue and water (just remember to use 2 portions of glue by one of water)

– Let it dry and if necessary put weights on the corners fo the mat so it stays in place while it dry.
After the mouse pad is completely dry repeat with another layer. I only did 2 and it works perfectly, but if you have a thinner fabric I would recommend you use 3 layers.


Let it dry completely and cut the excess of mat on the edges. You are ready to use your fabric moused!


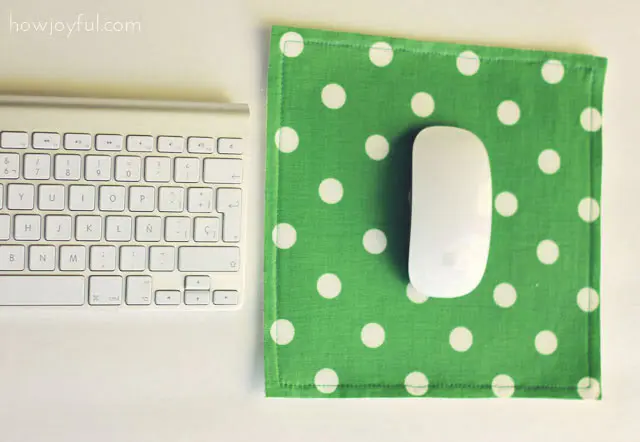
I love this mousepad and the best thing is that I can make them as bigger or smaller I need, with pretty fabrics for a more customized desk look =]
* This tutorial and patterns are provided for personal, non-commercial use only. The pattern is a PDF file, the link goes directly to Dropbox, but you don't need an account to view it, you will need Adobe Reader or a similar program once the file is downloaded.
Check the Site policy at the bottom for further information. Thank you!
I hope you have a lovely day!
Patricia
Monday 2nd of March 2015
I absolutely love this project. I'll have to go out and grab a roll of paper towels especially for this project. I can't wait to make mine and maybe even make some for gifts. Super easy! Thanks!
The 5 Dreamcatchers
Thursday 8th of May 2014
I love it! I've picked your idea for my post "Diy Scrap". I hope you visit my blog and like it.
Xx
Thanks!
tru leigh
Saturday 7th of September 2013
I'm getting ready to make a couple of these. I'm thinking I should use the modge podge first on the fabric, let it dry, then sew.
Or maybe I should skip it all together and just use fray check on the edges and little interfacing for stiffness. I'll make a couple of trials before I use my good fabric.
Jude
Sunday 16th of June 2013
Hi Joy...I am curious as to 'what' kind of fabric did you use on yours? Also, I noticed that you have a different kind of edging? Did you just sew a border around the inner edge? GREAT idea!
Joy
Monday 17th of June 2013
Hi Jude!
My fabric is an outdoor cotton canvas, but it's thiner than the heavy cottons (actually kind of see through) And just like I explained in the tutorial, I just sewed a line inside the border of the fabric, once everything was dry I cut the non-slip mat to the size of my fabric =] I hope that helps! XO
Michele
Tuesday 16th of April 2013
I have made two of these, the first one bubbled, I was putting it on as thin as possible. The second one, I put a stabilizer on. Now it is really rough. When I went to the store to get the Mod Podge, I didn't realize there were so many choices, I choose the one for fabric. I went back and got the glossy finish, maybe that is why it is rough? I had not worked with mod podge before, so I am not familiar with the different ones. So I looked back at your tutorial and noticed you had the matte finish. So I will try it again. I really want this to work! I am making them for teacher gifts.
Joy
Monday 10th of June 2013
That is very weid, mine didn't bubble at all but the corners were a little curled when I first made it, but after it dried I placed it on the middle of a book for a day and after that the corners were as flat as can be. Maybe your pad (the anti slip) didn't let the fabric breathe? I hope it worked out for you!
xo