


Learn how to draw leaves step by step in this tutorial where we will go from super simple and easy, to drawing specific leaves by name. We will cover the basics and parts of a leaf and go into step-by-step doodles from imagination to using a real leaf found in nature as a reference for our drawings. So today you will learn 25+ different leaves for your bullet journal or project.

Learning how to draw leaves is really simple when you have a step-by-step tutorial on hand. It’s actually easier to do it this way and not from a video, because you don’t have hit the pause button all the time. Everything you need to know is there right in front of you.
In this tutorial, we will cover Leaf Drawing 101:
- The basic parts of a leaf
- Step-by-step leaf doodling
- Imaginary leaves vs. realistic leaves
If you want to master how to draw 25+ leaves – whether to decorate your bullet journal or to illustrate a project – this is the perfect learning forum for you!
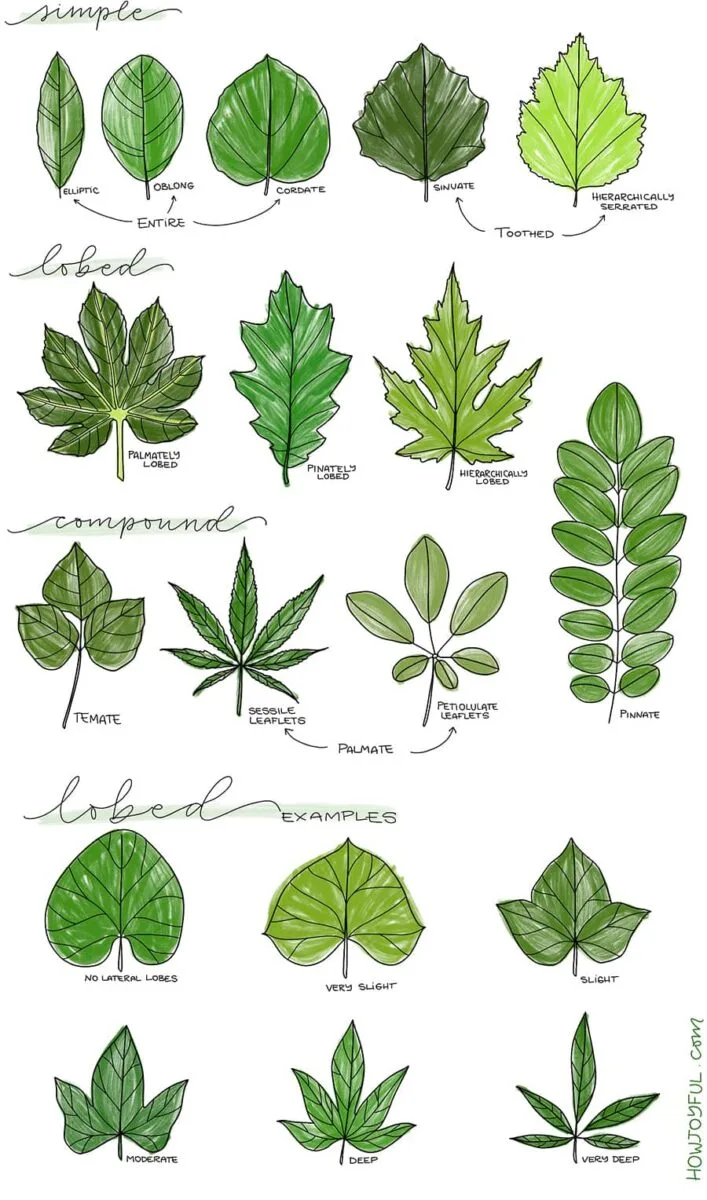
- Parts of a leaf
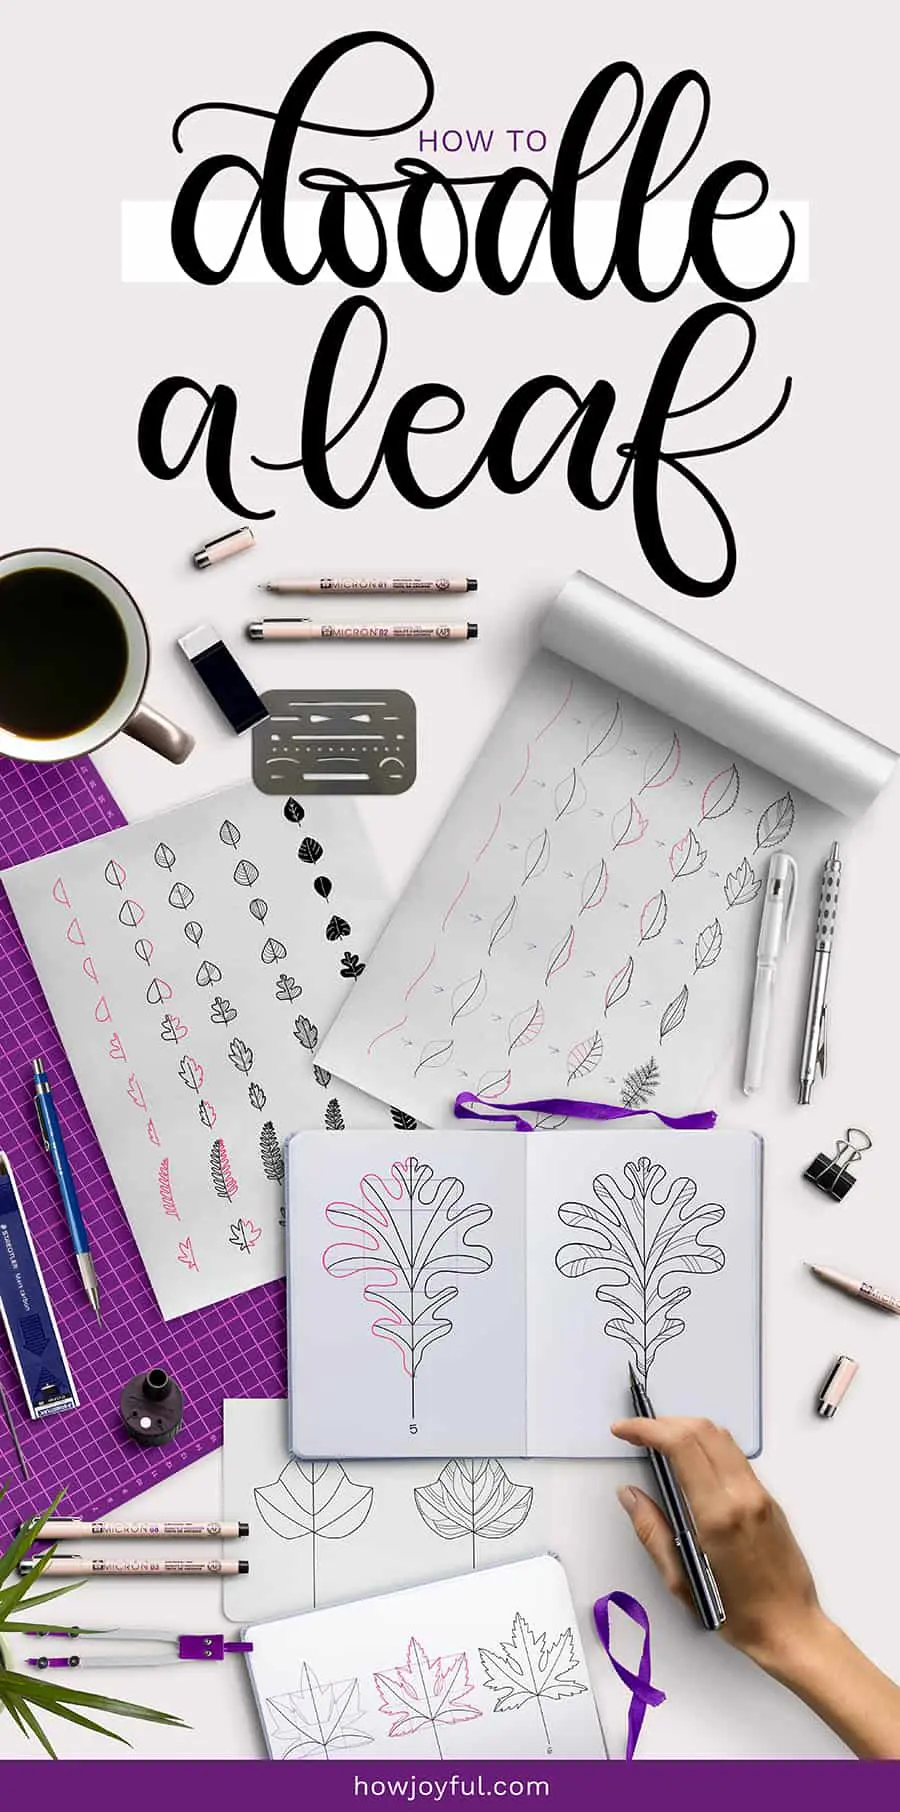
- Drawing supplies
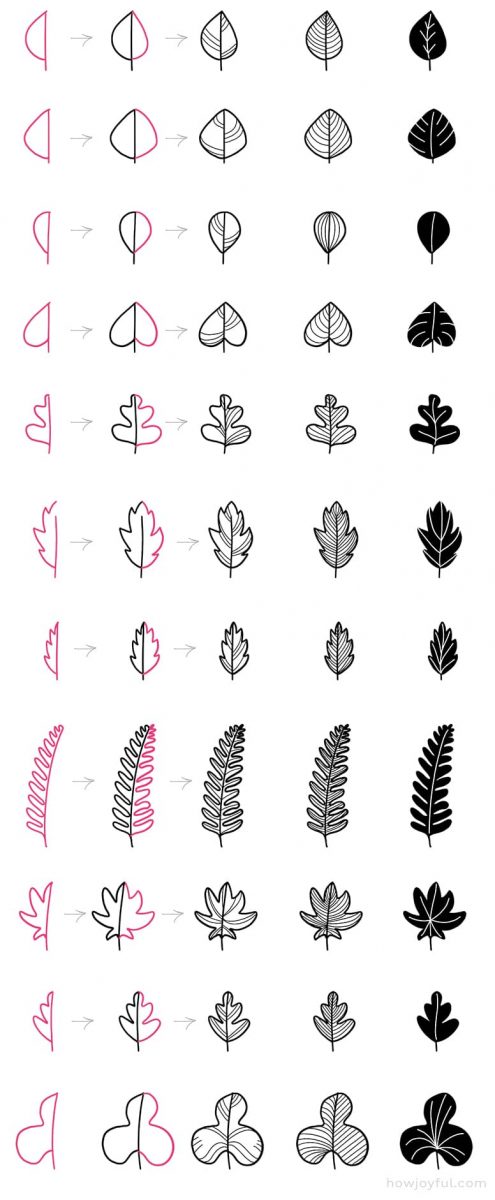
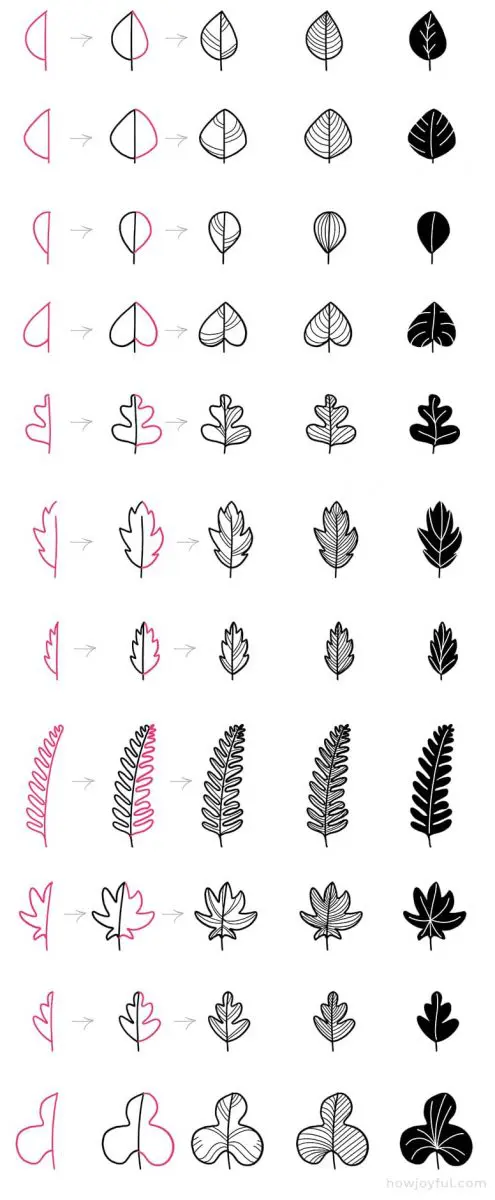
- How to doodle leaves
- How to draw a simple leaf
- Drawing a Ginkgo leaf
- Drawing a Red Maple leaf
- Drawing an Ivy leaf
- Drawing a Sugar Maple leaf
- Drawing a Red Oak leaf
- Drawing a Silver Maple leaf
- Drawing a Bur Oak leaf
- Drawing an Ash leaf
- Drawing additional leaves
- Using your leaves, more posts for you!
Parts of a leaf
While I don't want to make things too complicated when it comes to drawing leaves, I do think that is important to know all the part of a leaf in case you want to get more detailed and want to make them look as realistic as possible.
If you do want to go the realistic way with your colors and details of the drawing, knowing the parts is essential. If you want to create simple drawings or just very easy doodles, is still good to know some basics of leaves, so we can capture the essence of the shape.

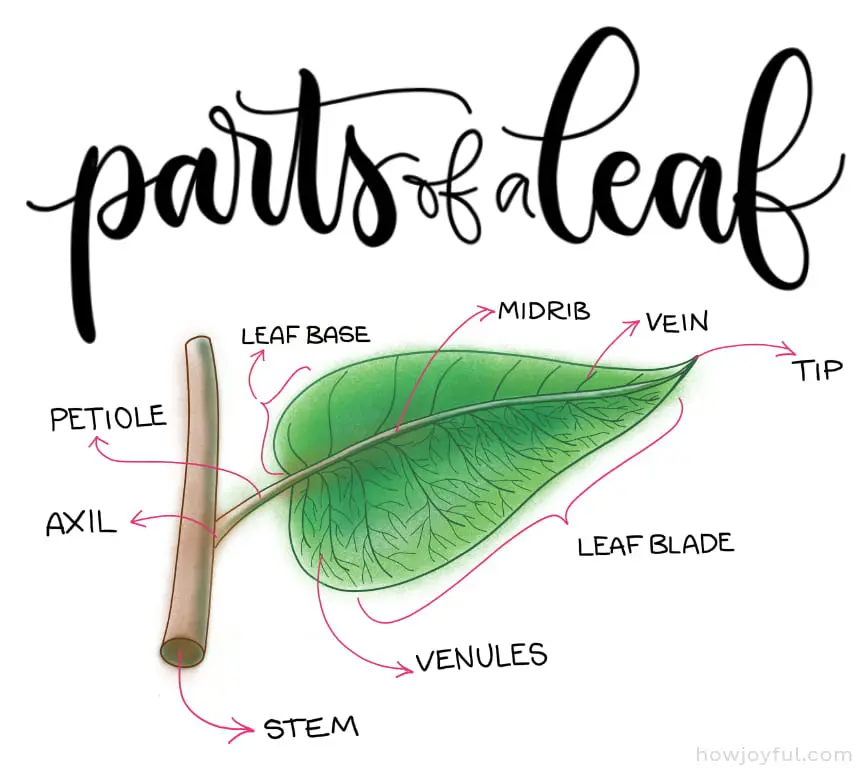
- Stem: A stem is basically the plant’s support system. The stem is the tiny stick part that connects the leaf to the branch and thereby providing the leaf with a structure to which it is attached.
- Axil: The axil is the upper angle between a leaf and the stem to which it is attached. The axil is the part that connects the petiole to the stem. It always connects at an angle.
- Leaf base: Pretty self-explanatory – the leaf base is the lowest edge of the leaf. It is the lowest part of the leaf connecting to the petiole. Sometimes has similar contours to the cupid’s bow part of a heart shape or an archery bow.
- Petiole: It is the stalk that connects a leaf to the stem of the plant or branch.
- Leaf-blade: Also called the lamina (Latin for thin slice/layer/leaf). This part of the leaf needs to be thin and flat to aid the leaf’s aerodynamic properties.
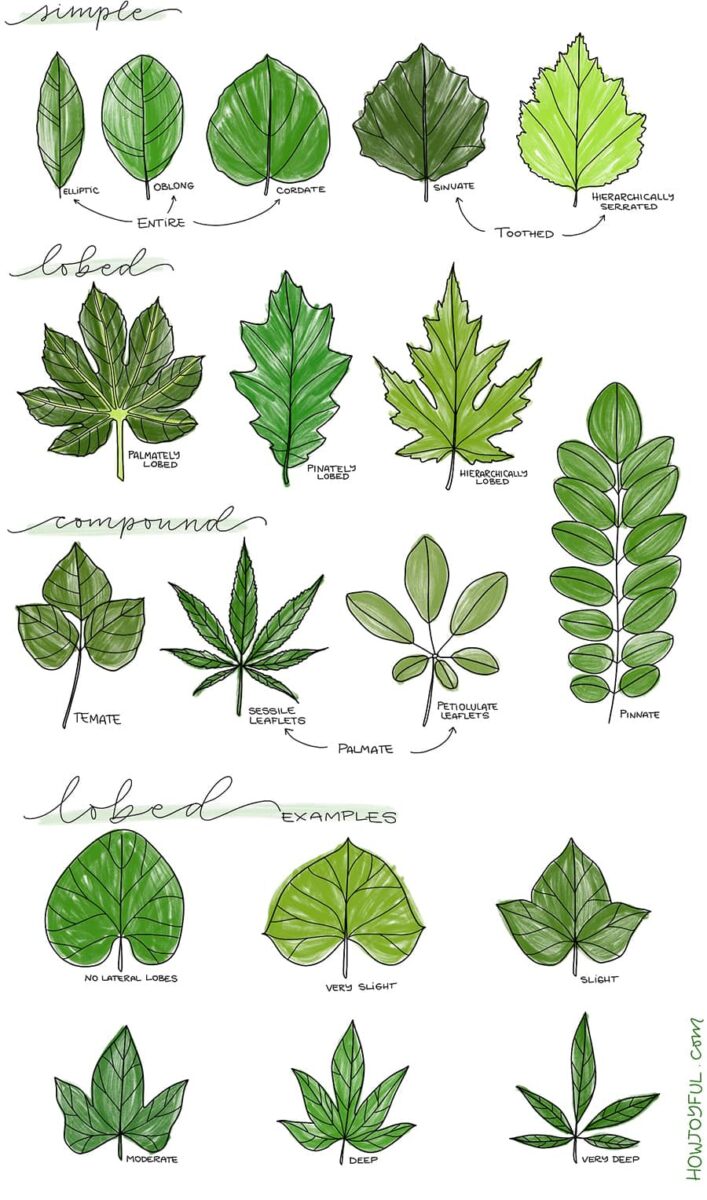
- Leaf lobe: The partially separate section/s found in some leaf types. It is distinct from the main part of the leaf with an indentation, called a sinus, and can break the leaf shape all the way to the mid rib, as in the case of very deep lobes. The leaf’s continuity of structure can sometimes include serrated (sharpened spike points) or rounded lobes, with the number of formed lobes varying from two lateral lobes all the way up to countless leaf lobes. The lobes are considered by some artists to be the most defining characteristic of a leaf when it is drawn in more detail.
- Vein: Just the same as the veins in our bodies, only leaf veins transport essential nutrients and water from the roots to the leaf, and carry away photosynthesized by-products.
- Leaf margin: The leaf’s outline.
- Venules: These are the smaller veins on a leaf.
- Midrib: The most identifiable part of leaf structure and often the only part of a leaf we draw when sketching a basic leaf form, the midrib runs from the petiole to the leaf tip. A lot like the leaf’s backbone.
- Tip: Most leaves have a tip; it’s the pointy end of the leaf, similar in design to the point of a heart shape. Even if the leaf appears to be completely round, it will still have a tip.
Drawing supplies
You can start drawing and doodling no matter the kind of supplies you have around your house, unlike when we are doing lettering or brush calligraphy, you can start with just about anything!
Now, of course, you can start practicing lettering with any supplies as well, but when you do brush calligraphy you need a tool that will allow you to create thin and thick lines depending on the pressure.
Since when we draw all we need is a monoline pen or pencil (monoline means the same thickness no matter the pressure or angle we use) we are good with whatever. BUT! Since I loooove office supplies, I do want to share some of my favorites and some extra tools that would help you take your doodling to the next level!
Oh, also, if you are looking for sketching paper, this HP paper rem that I recommend to start using with Brush Calligraphy is also wonderful for doodles, you can also use tracing paper to create “layers” and correct your drawings. I also recommend this journal in case you don't have one, and this notebook in case you want to add watercolor details or you want to make sure there's no bleeding on your pages since you can color and sketch on both sides of the pages, it's awesome, get it here!.
If you want to work on your iPad instead, here you can see a list of my current digital drawing setup and recommendations. Also, here you can read all about the Procreate brushes I use and recommend.
Sketching Tools
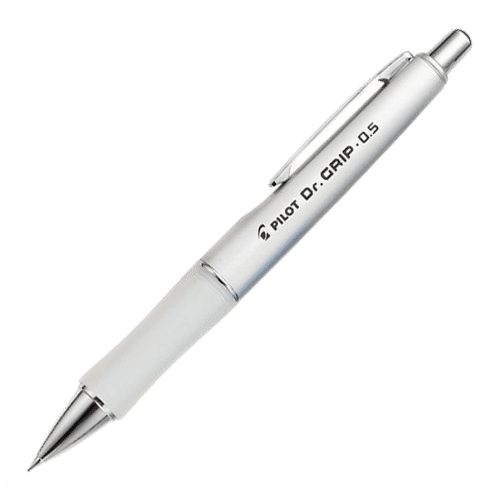
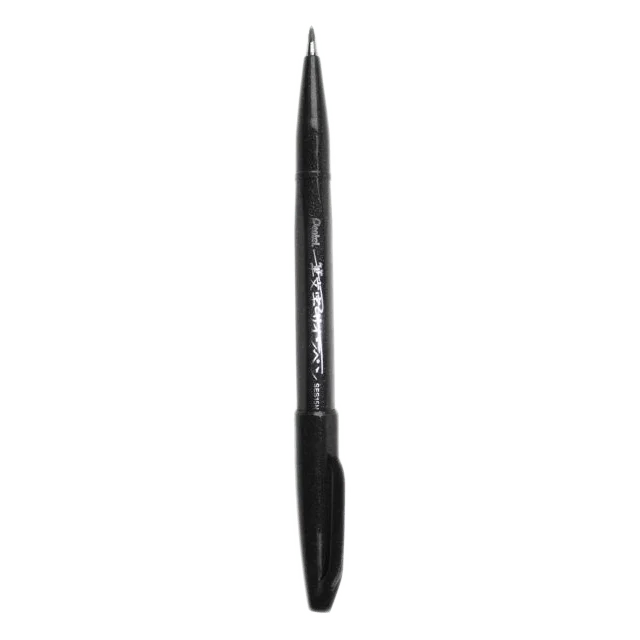
Pilot Dr. Grip Mechanical Pencil
This is one of my favorite mechanical pencils (especially the pink one). I love how thick this mechanical pencil is (0.5 mm). I always have it in my travel pencil case (if my boys don't steal it). The grip is super comfortable, and changing the lead to a softer one will give you so much control and shades.
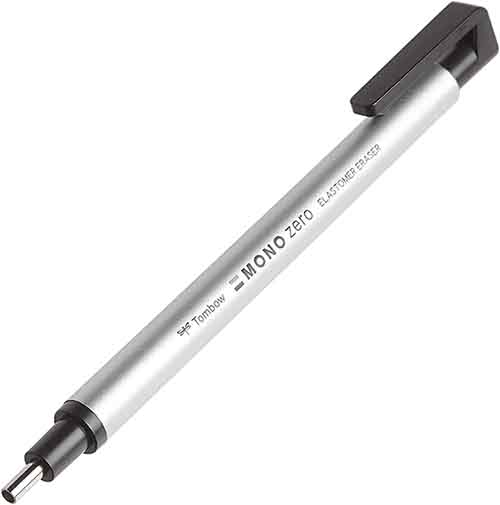
Tombow Eraser
I love using this eraser for detailed lettering and illustration work. The tip is tiny, making it easy to erase tiny areas with precision, whether I’m cleaning up pencil guidelines, sharpening edges, or adding little highlights to my drawings. Because it erases only exactly where you need it, I don’t have to worry about disturbing the rest of my artwork.
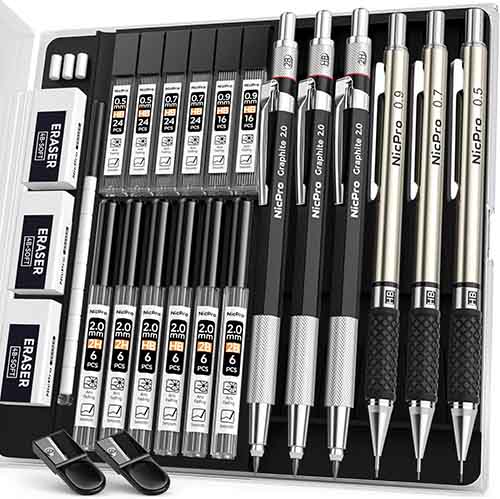
Mechanical Pencil Set
I recently found this pack, and it's so good for beginners, and the 0.7 mm size is my favorite lead thickness; having a 0.9 as well is so wonderful! And while they come with HB leads. While there's different softness for the big lead. For the smaller pens, I like to get something softer, like a 2B. When I add different leads, I like to mark the pens with small labels.


Pentel Triangle Eraser
I first purchased this one while still in college back in Chile; it was the older version but the same concept. I love that the shape of the eraser gives you three points that you can use to be more precise; it's much better than the round ones, in my opinion. It's a great alternative if you don't have an eraser shield.


Staedtler Eraser
There are some things that, once you find the brand that you love, you just stick to it and never look back. For me, the Staedtler erasers are it. I've been using them since my early college years and greatly enjoy them!

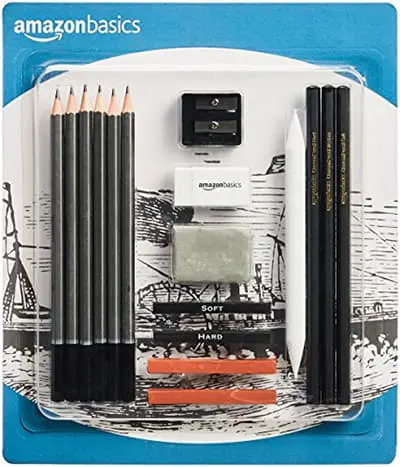
Amazon drawing pack
If you want to experiment with the different softnesses of pencils, this pack offers 6 different softnesses of graphite pencils, 3 charcoal pencils, 1 sketch stick, 4 charcoal sticks, 1 pencil sharpener, 1 charcoal sharpener, 1 kneaded eraser, and 1 white plastic eraser.
Beginner Drafting Set
If you want to experience the different softnesses of leads and also get to use separate mechanical pencils for outlines (red, blue, and yellow), this set is such a good bang for your buck!
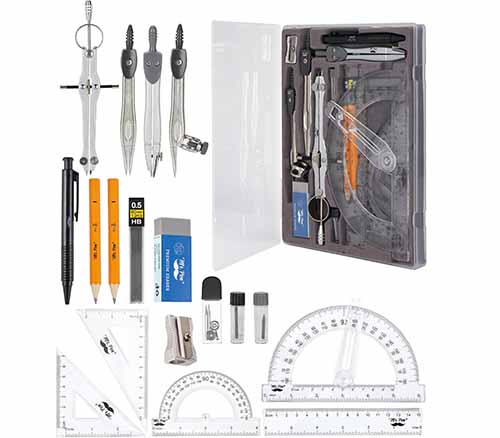
Beginner Drafting Set
This kit is just what you need when you want to make sure that your composition is on point. Making line and circle guides is a must to ensure that your letters are the same size in a word and that if you are making mirrored compositions, things are actually the same widths and angles. Later on, you might not need them as much, but while you train your eye and hand, guides are a must!
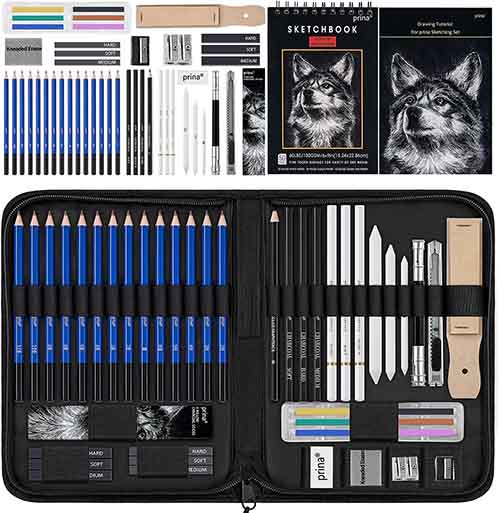
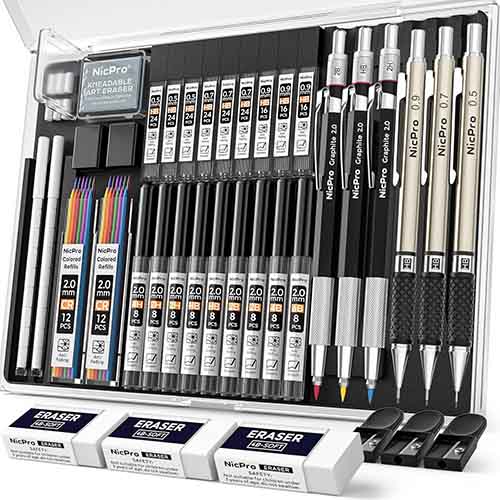
Sketching pack (50 pieces)
If you are looking for an even more complete option that is also very budget-friendly, this pack offers just about everything you would need (paper included). It even comes with a pouch so you can carry all your pencils and tools.
Inking Tools

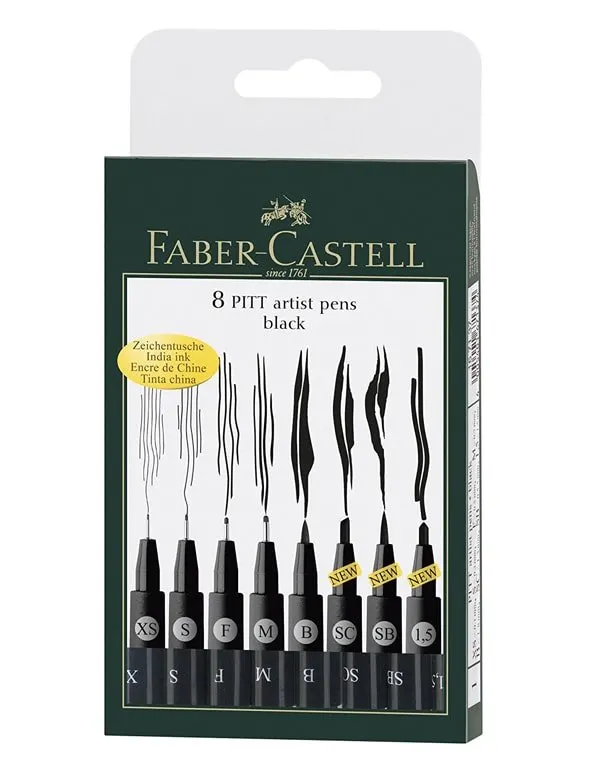
Faber-Castell Pitt Pen set
This pack is wonderful for lettering because you get a wide variety of thicknesses and also one brush pen, so if you want to start lettering but you are not sure if brush calligraphy is for you. You can just get this and start practicing with the one included here. They are a great deal too! (Instead of buying them in singles)

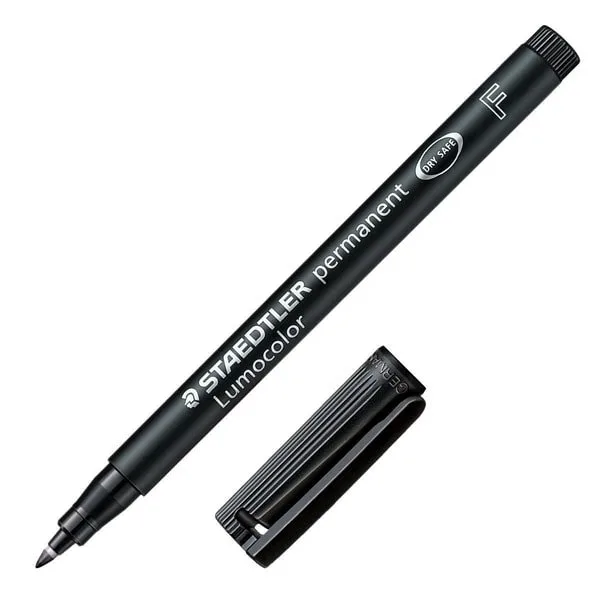
Staedtler Lumocolor Fine Point
I love that this pen can be refilled (the refill station is sold separately), but if you are doing a lot of work, something like this comes in super handy. I was using SO MANY pens until I found this kind of refillable ink pen. They are not as cheap at the beginning but worth every penny eventually.


COPIC Multiliner Pack
I was also introduced to these multi-liners during technical drawing in college, but it took me a while to find them here. I love that these particular ones have a great range of thickness, they are refillable, and you can also replace the nib. These features are wonderful because I can go through one pen in just a couple of days, so this feature really helps my wallet (and can save you a ton too!).

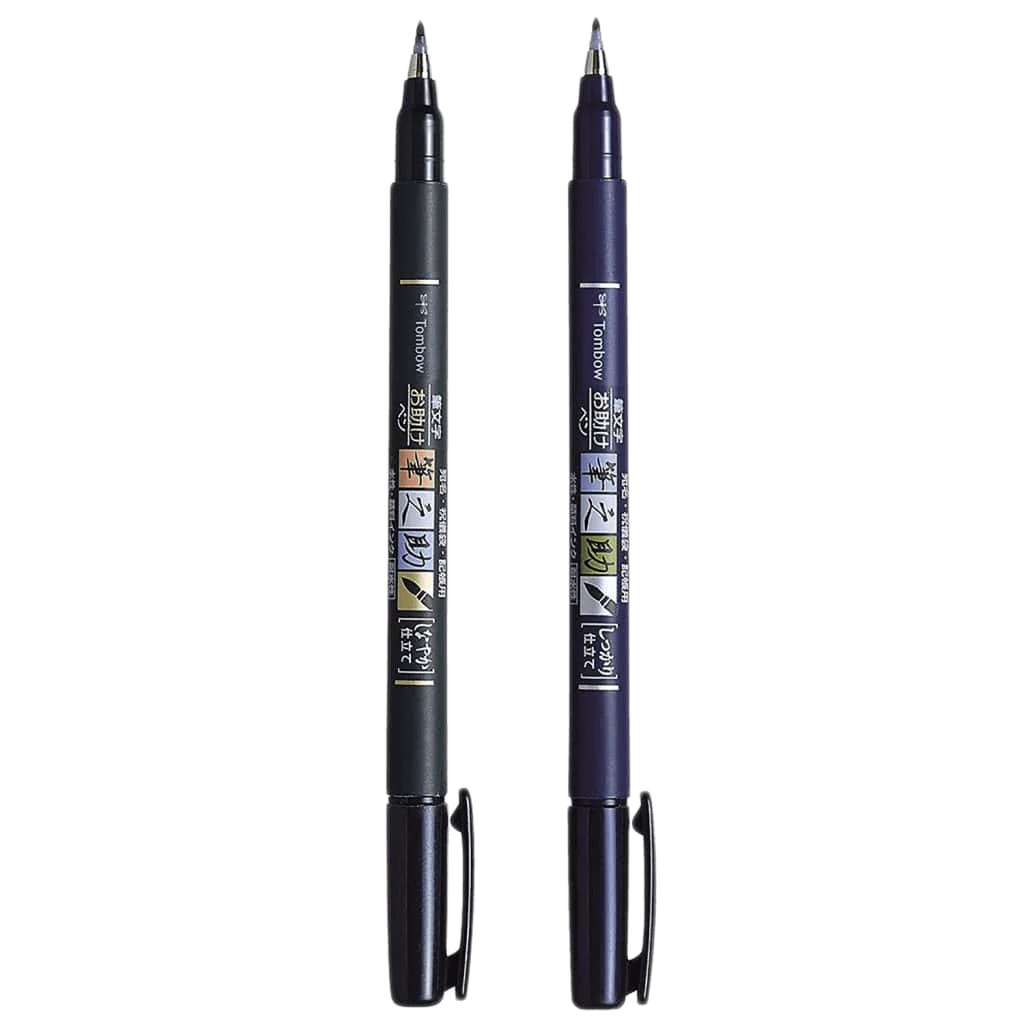
Tombow Fudenosuke Brush Pen
This brush pen set is by far my favorite when it comes to learning; it comes in a soft and hard version. Even though the difference is not huge, you can make a little thicker downstrokes with the soft tip. They handle pressure amazingly well, and if you use them with the correct paper (read my paper recommendations), they can last you a long time. They come in different colors that are bright and so pretty.

Pentel Fudenosuke Brush Pen
This one is my second favorite fude brush pen; you can also get it in a bunch of awesome colors, and that is always a plus. (You can see them linked below.) I love how durable they are, and they have lasted me way longer than I thought they would.
Tracing multiple layers

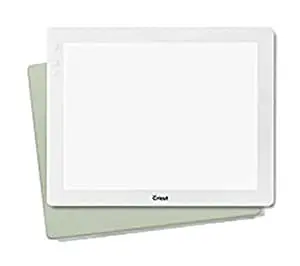
Cricut BrightPad
After using the Cricut BrightPad for a few months, I am a converted believer. It's so much better than my older Lightbox (it was a small corded one). For me it's the little things, like the fact that you have to push down to change the brightness. In my old one, I would always accidentally hover over the button, and my brightness would change.
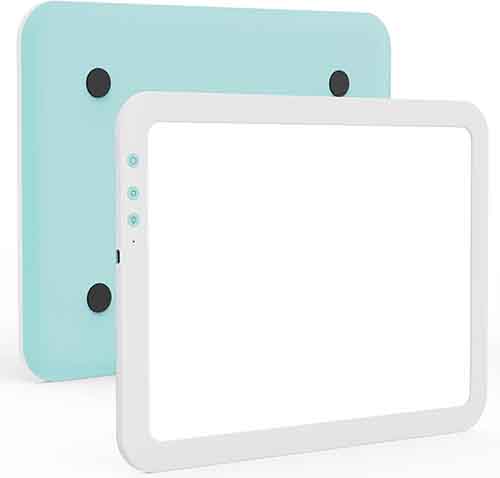
Rechargeable Lightpad
This light pad has quickly become a favorite in my house. I use it constantly for lettering layouts, transferring designs, planning worksheets, layering logo concepts, and even sewing projects. What I love most is that it’s rechargeable, similar to my BrightPad. My boys are constantly trying to take it away to work on their drawing pieces. Honestly, this one has earned a spot on my desk.
Looking for more amazing tools for drawing, lettering, and calligraphy? Then you might want to check my full guide here.
How to doodle leaves
Before getting into very specific leaves and how to draw them. I wanted to share some basic ways we can create variations when we are drawing leaves. These are the basics we should keep in mind when we are doodling leaves and don't want all of them to look the same.
I will also cover the easiest way to add dimension and perspective to your leaf. These doodles are not just fun and easy, but they are the perfect filler for when we create Bullet Journal spreads, to accompany our flower drawings, or embellish our lettering and calligraphy pieces.
The basic shape


- Step 1: Start by drawing a straight line, this will be the midrib of the leaf.
- Step 2: leaving a small piece at the bottom to serve as the petiole, start with a round shape, and straighten your stoke until you reach the tip of the leaf.
- Step 3: for the other side, unless you want to show a side view, mirror the line you created on the first side.
- Yay! Congratulations! You just doodled your first leaf!.
Veining variations
Variations on the way we draw the veins of a leaf will give us completely different looks and can make them feel super different even though they have the exact same shape.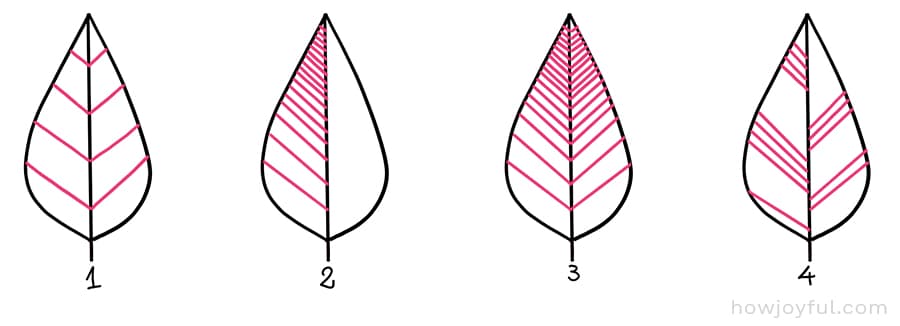

- Variation 1: This option shows equal separations in between the veins. It's the most basic and simple way to vein a leaf.
- Variation 2: In this example, I started adding veins with an average separation, and kept adding them closer and closer together as I went along.
- Variation 3: This variation shows the exact same veining I did in variation 2, but this time on both sides. Adding veining to only one side is a great way to make leaves different from each other while not making them too busy.
- Variation 4: Adding an uneven number of lines in scattered places on the leaf is one of my favorite ways to draw leaves. I started drawing them like this when I was little and I guess it stuck since then, so if you have seen some of the floral patterns, you have probably seen this variation.
Angle variation
A great way to not only add variations to your leaves but also give more perspective to your drawing is to use angles or slant when drawing the stem.

- Step 1: Start with a slanted semi/curved stem, as curved as you want!
- Step 2: Make your first side starting with a curve, straighten it as you go all the way to the tip of the leaf.
- Step 3: Instead of simply mirroring the other side, try to make it a little smaller, this will give perspective and dimension to your leaf.
- All done! Look how pretty your leaf turned out!
Leaf shape variation


- Variation 1: This is a small variation on the basic shape, just by making the leaf base a little wider, we get a completely different look.
- Variation 2: This is the contrary to the first variation, instead of making it wider, I keep most of the shape of the leaf the same size, this makes it look more oval than pointy, it's a perfect soft leaf for your drawings.
- Variation 3: Now I tried to make the leaf look more like an egg shape, with a more flat base. This almost makes it look like a eucalyptus leaf.
- Variation 4: Once you experiment with the different shapes that you can get with an even line, it's time to spice things up and try completely uneven lines. I really like to try and not mirror one side exactly after the other, because just like our bodies, leaves are not 100% symmetrical, and I think that showing that they are not, gives them a more natural look.
Doodle leaf examples
Now that we know the main ways that we can create variations in our leaves, let me show you some examples of my favorite (imaginary) leaves. I say imaginary because the whole point of doodling leaves at this point is to experiment with the shapes and not restrict yourself trying to copy shapes that are established in accurate botanical leaves.
How to doodle leaves
1. Begin by drawing a straight vertical line. This will become the leaf midrib.
2. Remember to leave a small section at the bottom of the leaf; this will be the petiole. It might help to turn your drawing book horizontal for this next bit; start as though you are about to draw a small hill; round the top off and then taper and straighten the stroke to the end of the line to create the leaf tip. When you tilt the midrib line sideways, it will look as though a small lopsided hill is rising from it.
3. Create a mirror image of stroke on the other side of the midrib or you can keep the leaf at the Step 2 stage if you want to draw the leaf in profile.
Yay! Congratulations – you have just doodled your first leaf = )
How to draw a simple leaf
Now that we know how to doodle very simple leaves, we are going to step it up a bit and actually look at nature to draw our leaves, I like doing this when I work on botanical line drawing of flowers and other elements because to me there is no more beautiful reference than looking at what mother nature has created.
But because we still want to make them simple, I will be modifying the final shape a little. So we will not go into the details and finishing that make them look more realistic.
The process will be that I will show you a picture of the leaf we are going to draw and then I will show the steps we will take to achieve something as close as possible to the shape of the original leaf, but SIMPLIFIED so it's not too hard for beginners.
Drawing a Ginkgo leaf


Let's start with a somewhat unconventional leaf, the ginkgo leaf. This is a fan-shaped leaf that sometimes has a defined center division, sometimes, like in the sample above, it looks like one single fan with veins radiating out into the leaf blade.


- Step 1: To start with the guidelines for this leaf, draw a straight vertical line and mark a little above half-point, make another point halfway in the top space. Then draw a horizontal line a little bigger than the half-point we already dew. Start a semicircle from one point to the opposite one.
- Step 2: Sketch on top of the bottom stem of our guidelines and make a rugged edge on the top, right on the center go in halfway, and continue mirroring the previous side.


- Step 3: To finish it up, add smaller lines around the edge pointing inwards, and from the center to the outside of the leaf.
Drawing a Red Maple leaf


The leaves of the red maple are lobed with 3 to 5 lobes depending on the age of the leaf. The leaves are green in summer and yellow/reddish during the fall. The margin of the leaf is serrated.


- Step 1: Draw an elongated vertical line with a shorter horizontal line transecting it a little less than midway from the top. Add the connecting petiole/leaf base line a short way into the vertical line. Just under the horizontal line, demarcate a dotted line to use as an anchor.
- Step 2: Draw 2 connecting lines, from the right and left sides of the horizontal line to join with the petiole/leaf base line. You will now have a facsimile of an upside-down triangular shape with slightly curved sides.


- Step 3: Using the dotted line for an anchor, connect it to the leaf tip, creating a slightly curved-sided triangle. Using the upside-down triangle as a base, draw 2 sweeping curved lines to the leaf base.
- Step 4: Using the leaf framework you have created, begin serrating the right side of the leaf margin, from the tip to the base. Duplicate serration on the left side of the leaf.

- Step 5: Remove your anchor guidelines with an eraser.
- Step 6: Add custom venule texture and color if you like.
Drawing an Ivy leaf


Most leaves are dull green, lobed, with distinct light veins. Mature leaves are glossy green and unlobed. The size, shape, and color of the leaves depend on the variety of the ivy plant.


- Step 1: Start with your standard vertical and horizontal lines with indented markings a short way in from the ends; add demarcated dotted lines one third and two thirds along the vertical line.
- Step 2: From the ends of the horizontal line, draw connecting lines to the bottom marker, thus creating a flattened triangle shape.


- Step 3: From the leaf tip, draw a descending line connecting to the right horizontal side, remembering to indent the line according to leaf type. It will resemble a stock market chart if the shares are tanking! Next, carry the line through to the bottom marker in a long sweeping curve, using the dotted line as a guide for when to begin curving the line back in toward the leaf base.
- Step 4: Duplicate the lines you have created on the other side and erase all the guidelines you don’t need anymore.


- Step 5: Create the main vein lines, right side first, and then duplicating them on the left side.
- Step 6: You can either color the leaf as it is or add highlights and textures by drawing venules in patterns.
Drawing a Sugar Maple leaf


Both the sugar maple and the Norway maple are large, 5-lobed leaves, with the sugar maple leaf having a few large teeth and rounded spaces. Green during the summer, turning golden reddish in the fall.


- Step 1: Draw out the standard vertical line, but this time section it into 5 horizontal lines, with 4 guidelines and 1 leaf base line. Next, create structure anchors with dotted lines, as shown.
- Step 2: Using the leaf base guideline as an anchor, draw 2 curved, branching lines at the bottom and 2 arching lines up to the horizontal line at the top.


- Step 3: Create the structure for the leaf lobes by crossing the top diagonally branching lines with an ‘x’.
- Step 4: Remember those ‘join the dots’ puzzles kids like to draw? Now it’s time for you to connect the dots, only this time you’ll be creating the leaf margin on the right side by drawing sweeping lines from the leaf tip to the leaf base, moving from point to point.


- Step 5: Repeat ‘joining the dots’ on the left side to complete the leaf margin.
- Step 6: Remove lines you no longer need and color or add venules for texture.
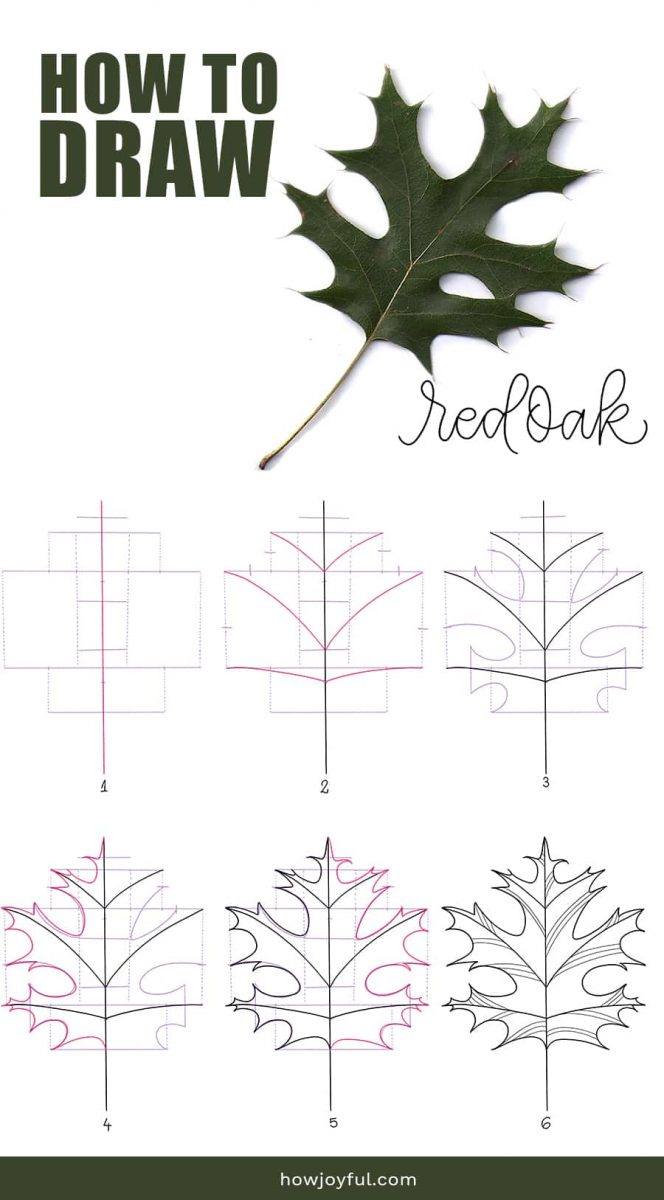
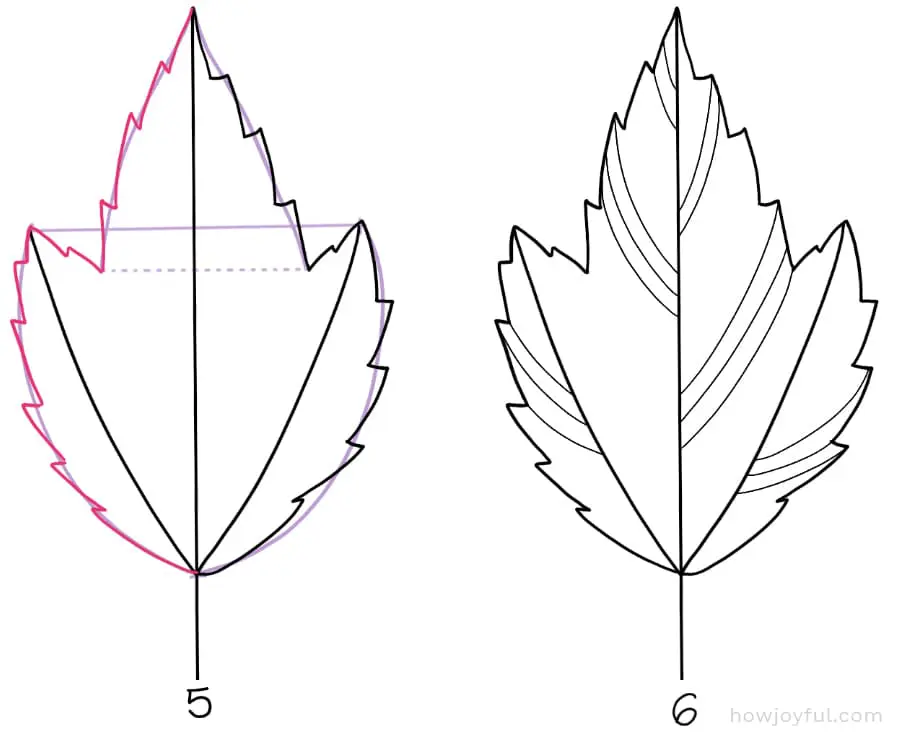
Drawing a Red Oak leaf


The red oak leaves have point edges, if you are interested in learning more about oaks and how to differentiate them, the Forest Service has this great Field Guide to Native Oaks.


- Step 1: Using a vertical line as your basic leaf structure, demarcate it into horizontal sections as above. Once you have the horizontal lines in place, add your dotted anchor guidelines.
- Step 2: Add short lines to denote the points where the red oak leaf’s lovely serration and curves are indicated. Next, add the ‘branch’ veins, slightly curving out to the corner points of the dotted anchor lines.


- Step 3: This is the fun part; begin adding the anchor curves. They will look exactly like lobes, sweeping ‘u’ shapes flowing from point to point.
- Step 4: A bit more intricate, but still fun; join the sweeping lobe ‘u’ shapes by adding more curves. First do one side, and then duplicate it on the other.


- Step 5: Remove the guidelines you don’t need.
- Step 6: Add texture venules or color to your liking. The structure of the red oak leaf may be a little challenging at first, but the beautifully serrated lobes are well worth the effort.
Drawing a Silver Maple leaf


The silver maple leaves are 5-lobed more than halfway to the midrib. Margins are irregularly double-toothed. The leaf surfaces are light green above and white to silvery below, giving it the common name “silver maple.” Fall coloring is light green to yellow-brown.


- Step 1: Now that have mastered the complexities of the serrated, multiple lobes of the oak, its time to revisit the maple leaf. Beginning with the vertical line, add 4 anchor lines at horizontal points. Then it’s time to add the dotted guidelines for the structure. You can use a ruler or other straight edge drawing tool to do this or try freestyling it.
- Step 2: Next, join the top horizontal line to the guideline denoting where the leaf connects to the petiole, and then using sweeping down lines, creating an upside-down triangle.


- Step 3: You might need to keep an eye on the illustration here. Create the leaf tip by drawing an upside-down v-shape with slightly curved sides. Next, add a truncated upside-down v-shape from the top horizontal line to the middle. Draw 2 sweeping arcs on each side, under the upside-down triangle.
- Step 4: It’s ‘join the dots’ time. Create the serrations by following your guidelines in the leaf shape shown above.


- Step 5: Further enhance the serration by creating more detail along the leaf margin. Remove anchor lines.
- Step 6: Color your leaf as you like, according to season.
Drawing a Bur Oak leaf


The bur oak leaves are roughly obovate in shape, with many lobes, about 6 to 12 inches long. The two middle sinuses nearly reach the midrib dividing leaf nearly in half. The lobes near the tip resemble a crown, in the summer they are green above and paler, fuzzy below.


- Step 1: The very definition of a lobed leaf, the bur oak is a fine example of softly rounded lobes and sinuses. First, draw your vertical line and add the demarcated horizontal anchor points (there are 9!).
- Step 2: From the vertical line, add the branched vein structures, curving them in sweeping lines outwards. Create dotted guidelines.


- Step 3: Add more outward sweeping branch lines, making the leaf skeleton look like an elaborate candelabra.
- Step 4: Create flowing lobe lines from the leaf tip to the leaf base, using the dotted lines and branch lines as a guide, remembering to taper it into the iconic bur oak obovate shape.


- Step 5: Duplicate the flowing, sweeping curved leaf margin on the other side.
- Step 6: Remove the guidelines and add color or venule texture lines as you like.
Drawing an Ash leaf


Ash leaves are compound, 8 to 12 inches long, 5 to 9 leaflets/leaf. Leaves may be finely toothed or have smooth edges. Branches and buds are opposite with a single bud at the end of the branch.


- Step 1: This classic compound leaf shape is easier to draw than it looks. It’s actually a collection of basic leaf shapes on one long stem. The only challenge is to maintain the leaf’s beautiful symmetry. Begin by drawing your standard vertical line and adding 3 horizontal anchor points. Draw a circle around the top horizontal anchor point. You can do this freestyle, or use a compass drawing tool.
- Step 2: Next, create a vertical curved line, from the leaf tip, encompassing the arc of the top circle, and joining the vertical line at the base of the circle.
- Step 3: Duplicate on the other side.
- Step 4: Add 2 sets of upward branching diagonal lines, starting under the leaf you created in Steps 1 – 3, and moving down.
- Step 5: At the lower third section of the branches, draw 1 circle on each branch, freehand or using a compass drawing tool. I suggest that if you are drawing a large size leaf, to use a drawing tool until you have more experience with circles.
- Step 6: Create the base line of the leaf by drawing a curve from the first leaf tier tips to the main vertical line.
- Step 7: Repeat this on the second leaf tier.
- Step 8: Add the top line of the leaf tiers by drawing a curved line from the leaf tip to the base of the vertical line.
- Step 9: Erase guidelines, remembering to keep the leaf vein lines. Add color or leaf venule texture as you like.
Drawing additional leaves


Now that we have a better understanding of how many of the leaves found in nature can be used as inspiration for our simple drawing of leaves, I wanted to show a batch I drew inspired by the image above, they are a mix of reference and just imagination. Sometimes that's the most interesting part of drawing them, the fact that we are making them so unique to our style.


Using your leaves, more posts for you!
I hope you enjoyed this post and come back soon for more drawing and doodling tutorials. Have a wonderful day!
Doodle away!
Annie Tandy
Wednesday 25th of November 2020
I love how you used our leaf hunt to show different types of leaves to draw. That font is great! Thanks for linking to the source.
Joy Kelley
Saturday 28th of November 2020
Your hunt leaf activity is so fun! It was such an awesome reference! <3
Chanel
Monday 17th of September 2012
OMG. How could I have missed this?? So nice! I keep lookin at the pictures over and over again! I would love to have you plan a baby shower for me! (if I were pregnant)
Jessica Lynn
Sunday 9th of September 2012
So, somehow, sometime, I stopped getting updates for you. I can't believe how much stuff I've been missing! Off to check out posts I haven't seen. This is absolutely adorable!
Joy
Tuesday 11th of September 2012
When I changed to WordPress the people that were following the default feed of my blog stopped getting the updates! I am so sorry, I tried to find a workaround but it doesn't seem like it worked. I am so happy you came to check it out :)
TheBrideConcierge
Saturday 8th of September 2012
Seriously, it's all too cute and well-coordinated. Curly should be a professional model too!
Maria
Thursday 6th of September 2012
Cuuuute!