


If you have thought about making stickers with your Cricut Machine but didn't know where to get started, this is the perfect post for you! Because here, I will share an easy step-by-step for beginners on how to make stickers with your Cricut machine using the Print then Cut feature along with the offset settings to get perfect kiss-cut stickers.

Making stickers is such a fun project! Stickers are the perfect gift since you can make them in pretty much any theme you can think of. In color, black and white, waterproof, holographic, with the right materials anything is possible!
So let's jump right away into the process, I will share how to set up your files and use the machines, to have perfectly cut stickers, I am also adding a troubleshooting section at the very end. So if you have issues check that, I'll keep it as updated as possible =]

What is the Print then Cut feature?
The Print then Cut feature as the name implies allows you to print a sheet using Cricut Design Space and your home printer, then you cut it by placing the same sheet on your cutting mat and go through the process as you normally would when cutting with your Cricut machine.

Art for your Stickers
The very first thing that you need is a design for your stickers, the cool thing is that Cricut now has a long list of creative artists creating all kinds of art for you to use. I am so lucky to be one of them, you can check my profile in Cricut Design Space here.
For this set of stickers, I will be using a few different files, if you want to create the same stickers and follow along I will list them below, you can also always search for them with their numbers.

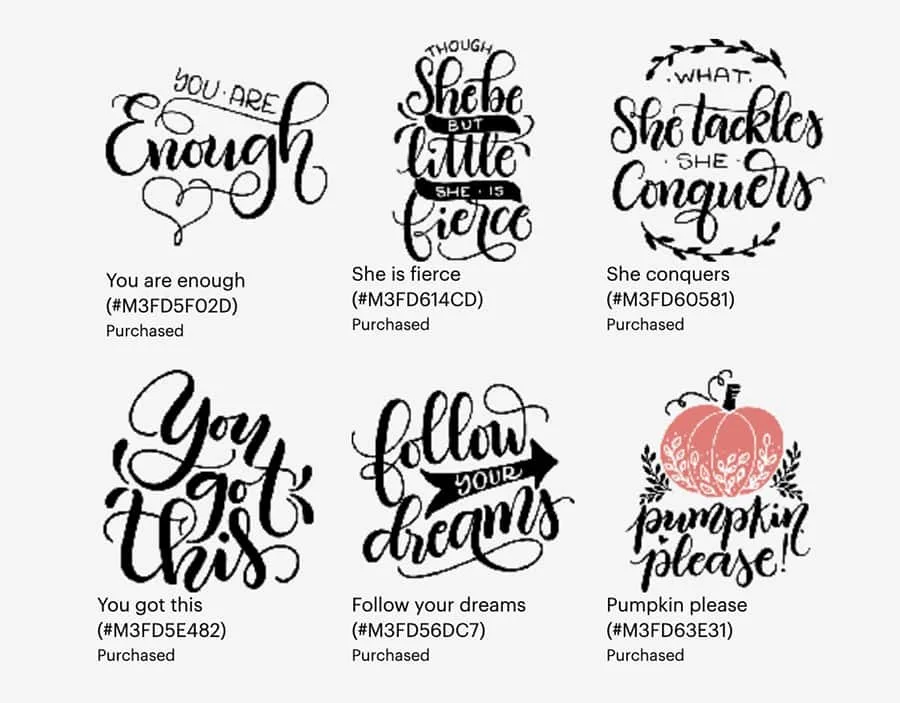
Art images used
- She is fierce #M3FD614CD
- Gather #M3EAFC495
- Follow your dreams #M3FD56DC7
- Pumpkin, please #M3FD63E31
- You got this #M3FD5E482
- She conquers #M3FD60581
Of course, if you would rather just check my Project and get all the files already set on a page, you can get it right here.
Materials and tools to make stickers
Now that you know the art that you will use, we need to go over the materials and tools needed:

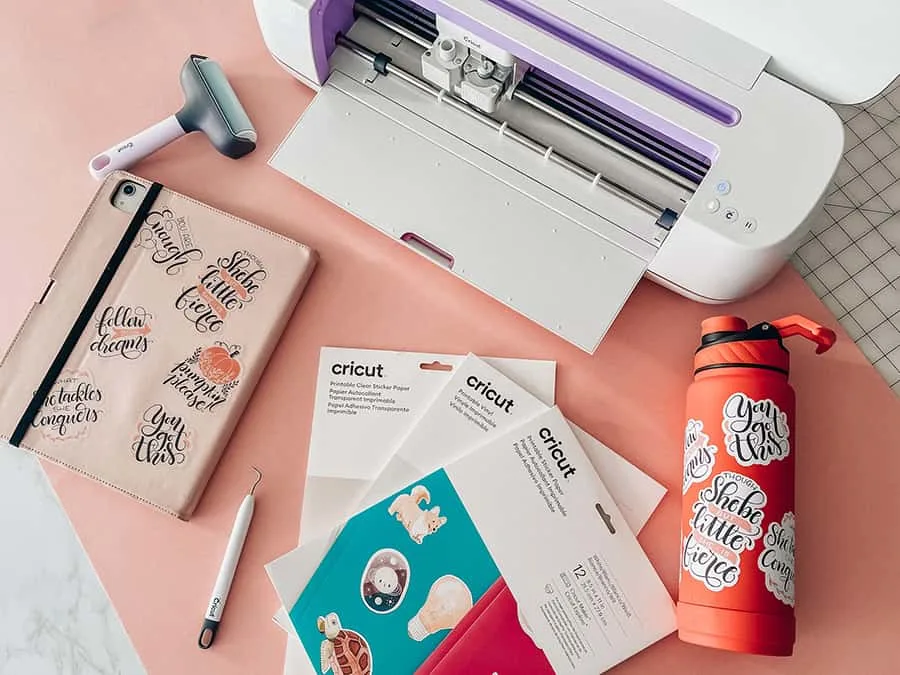
1 – Cricut Machine
You will need a Cricut Machine to cut your stickers, while you can cut vinyl stickers with all of the different Cricut Cutting machines, the Cricut Joy at the moment doesn't recognize the Print then Cut feature. They are different hacks to make it work, but for simplicity of use. I will be using my Cricut Maker for this project, if you have a Cricut Explore, the process would be exactly the same =]
Make sure you have your Green Standard Grip Mat and a Brayer.
2 – Cricut Sticker Paper
For this project, I am using different kinds of Cricut sticker paper and printable vinyl, so I can test them. I will be using:
3 – Printer
You will need an inkjet printer, if you already have one, you are good to go. I didn't have one since I only use laser printers for my business. But I found a very economical one to test the stickers, I think I might need to change it because it doesn't have a straight back-loading way to load the paper, and that is kind of a must with thicker paper, so that’s something you should look into if you are in the market for a Printer.
Loading your files
The first step to making a sticker is to add your designs to the canvas. I am going to show you the process step by step, all you have to do is follow this, and you can make a sticker out of any artwork in Design Space.
Import the file to create space, if the file is a regular SVG like all the ones I design, you will see them in different pieces, I design them this way so that it's easier to edit in case you want to use only a part of them, or in case you want to edit a portion.


In this case, I want to change the color of some pieces of my design, so I am going to select them and go to the top menu, under operation you can see a little square that has the color of the element in that layer.
There you can select the color from the swatch, or click on advanced and pick a color from there.


After you are done with the color changes or customizations, select the whole thing and click on the FLATTEN button. The layer will flatten and turn into a Print then Cut image, if you don't see it, all you have to do is to go to the OPERATION setting in the top menu and click “Print then Cut”


Using the offset setting
After your image is flattened, make sure it's selected and click on the OFFSET tool in the top menu, a box with all the options for the tool will show. There, you can slide the little circle in each direction to make the offset line smaller or bigger. Make sure that you have the option WELD OFFSETS on so that after you make the offset, it is inside a single layer.
You can see this as a blue outline around your art, in my case since the default option showed a bunch of small cuts inside, don't worry about that, on the next steps, we will get rid of all the small cuts on the inside of the sticker to that we only have the outline.


Once you have decided on the size of your offset, you can select the corner options. There are two available options, round or sharp. Depending on your art, you can select the option that looks better. I left it as round since my art has more round curves than sharp angular corners.

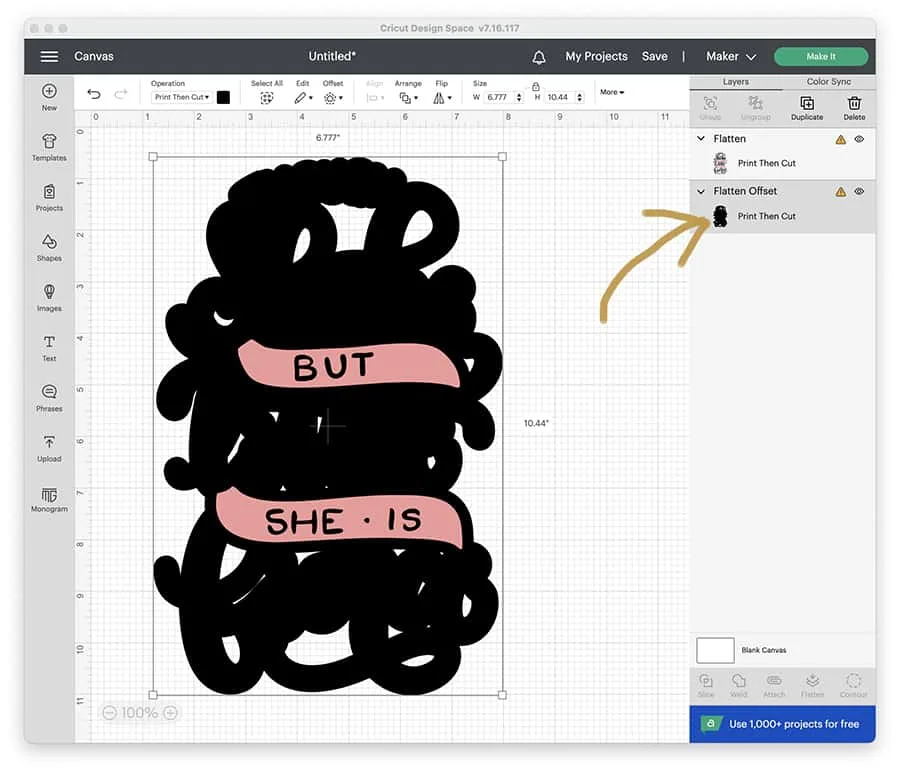
Once you click on the APPLY button, most times the offset will be black, since we want to see the letters, we will change the color and get rid of the inside cuts.
To change the color, we will again to the operation tool, I selected a gray color so that I can see the outline since my canvas is white.


The first step to get rid of the inside little cuts is to turn your offset into a BASIC CUT, so in the same operation tool, select BASIC from the dropdown. Once your layer is set as a Basic Cut, the CONTOUR tool will activate in the menu below your layers.


After clicking the CONTOUR tool, a window will pop up showing all the contours in your layer, all you have to do is click on the HIDE ALL CONTOURS button, this will get rid of all the little cuts inside your sticker.


Once the offset layer is ready, we need to make sure that is back from “Basic cut” to “Print then cut”, for this we just have to go to the Operation tool again and go to PRINT THEN CUT.


I also make sure that I set up the color back to white, since that's the color that I want as the border of my stickers.


Once the offset layer is back to white, we have to select both layers and click on the FLATTEN option in the submenu below the layers.


This will make our sticker (with the white outline) in a single layer. Now that we have the sticker ready, we can set our sheet to the maximum size, so we can fill it up with stickers.
Setting your sheet
When setting your sticker sheet, there are some things we have to keep in mind.
- You can not use the “Print then Cut” option on images larger than 6.75” x 9.25”. So our sheet needs to be
- If you haven’t calibrated your machine for Print then Cut in Design Space before, be sure to do this by clicking the drop-down menu in the top left-hand corner and selecting calibration.
The first step to set our sheet is to add a rectangle, to do this, head over to the left side toolbar and click on SHAPES, and select rectangle.
After that, click on the UNLOCK button in the Size option in the menu so that we can add custom sizes to the rectangle. The lock just lets you enlarge things without maintaining the proportions.


We will set the rectangle at the maximum size of the cutting area (6.75” x 9.25”) this way we can fill the sheet as much as we would like.


After your rectangle is at the needed size, click on the LOCK button again, so they can be proportional when you make things bigger or smaller.


Select the sticker and grab one of the corner little squares to make it smaller, now you can set it at the size you would like =]
I repeated the same process to make the offsets on all the other stickers and fit them inside my rectangle.


Since we will not need the square once we print and cut the stickers, we now can HIDE the layer by clicking on the EYE symbol on the right side of the layer.


After that, we are going to select all the stickers and click ATTACH, this way once we send them to print and later on to cut, they will stay in the exact same position. Now your sheet is ready to send to PRINT!
If you want to skip all of this setup and get this exact same sheet of labels, you can check this Project on Design Space.
Printing your stickers
Now that your sheet is ready to actually print and cut (or if you are loading the ready project on Design Space) all you have to do is click on the MAKE IT green button on the top right part of the menu, that will take you to this next screen below.


Here you can change the size, mirror, and other options that we really don't need to touch, so basically all you have to do is click on the CONTINUE button.
That will take you to this next screen, here is where Design Space will send the sheet design to your printer.


You want to make sure you select the right printer in case you have more than one from the dropdown menu. After that make sure to click and deactivate the ADD BLEED option, since we already added bleed or margin to our designs.
You also want to click and activate the Use System Dialog option, this way you can have more control and you will be able to see all the settings for your particular printer.


This window is specific to my printer, so yours will probably be different. All you have to make sure is that you are selecting the best printing quality for your specific paper, most printers have a photo option or something similar.


After that, make sure you loaded the paper in your printer and click PRINT.


Cutting the stickers
Now, this is the part where the real magic happens! Make sure that your printed sheet is correctly aligned on the top and left side of your cutting mat. I like using the brayer to make sure there are no bubbles.


Once you are ready, is time to select the material, below you can see that I selected the clear sticker paper, because I forgot to take a screenshot of this sheet up here, but if you just search for sticker, all the available sticker materials will show up.


Once your material is selected, you need to go back to the machine and load the cutting mat, after that click on the blinking “CRICUT” button to start with the cutting.
After you click on it, your machine will scan the sheet to identify the black border, this is how the cutting line will align perfectly with your stickers, it might take a minute or two and your machine will go slow, but this is normal, it's just reading the lines.


Now you can see the magic happen! It's so exciting to see how perfectly aligned everything is!


If you are having alignment issues, remember to Calibrate your machine for Print then Cut. I will cover more solutions to common issues below.


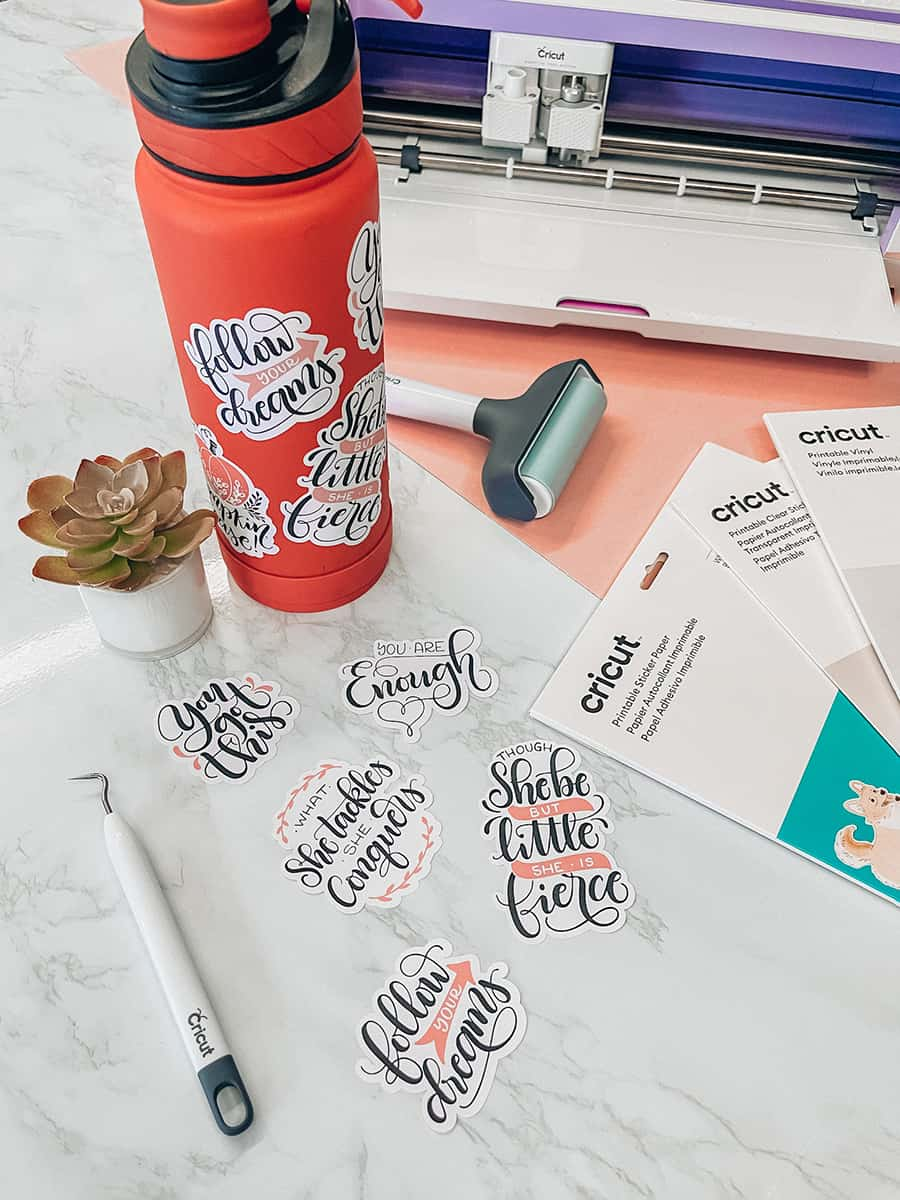
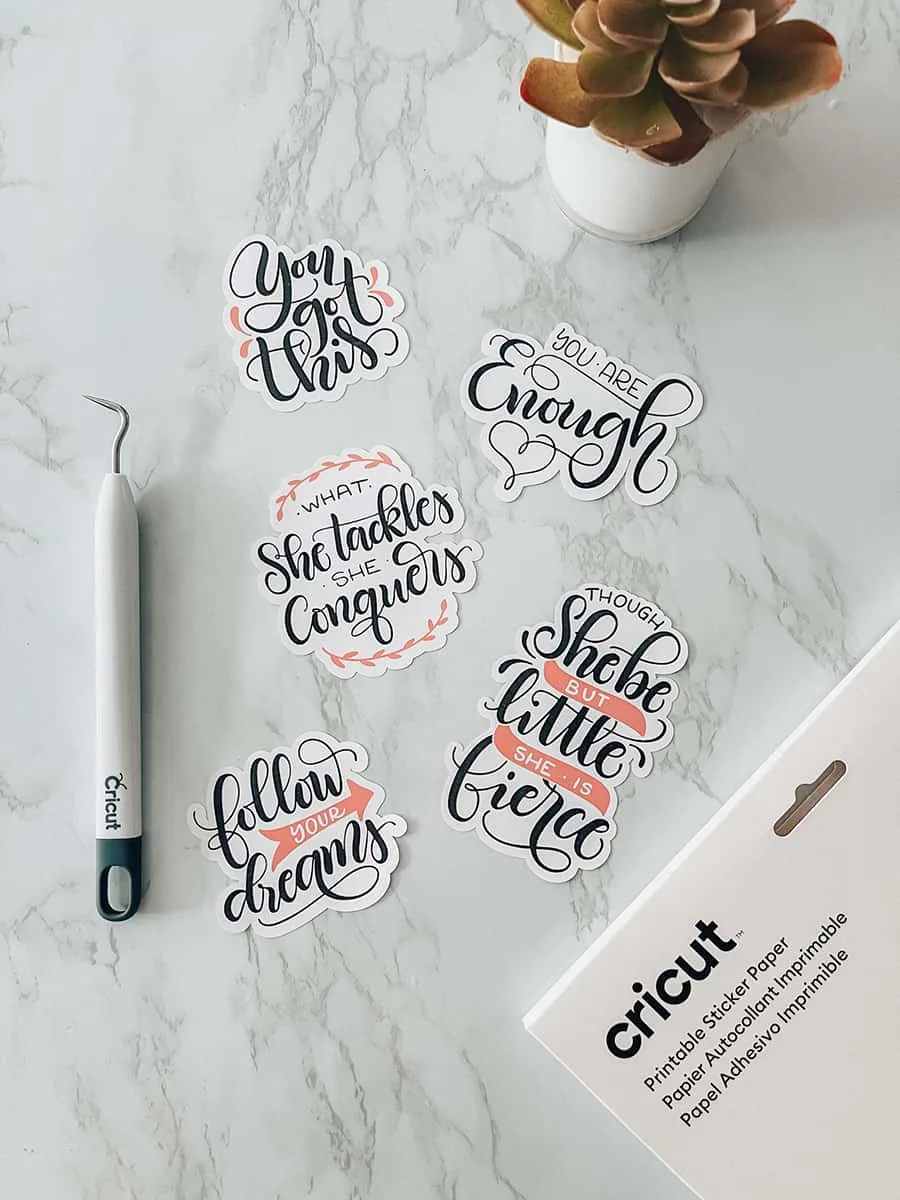
Above you can see a close-up of my stickers fresh off the cutting machine =] Still on the mat!
TIP: To avoid your material getting curled up, make sure you place your sheet on your table and peel off the cutting mat, instead of the other way around, this will make your sheet be nice and straight!


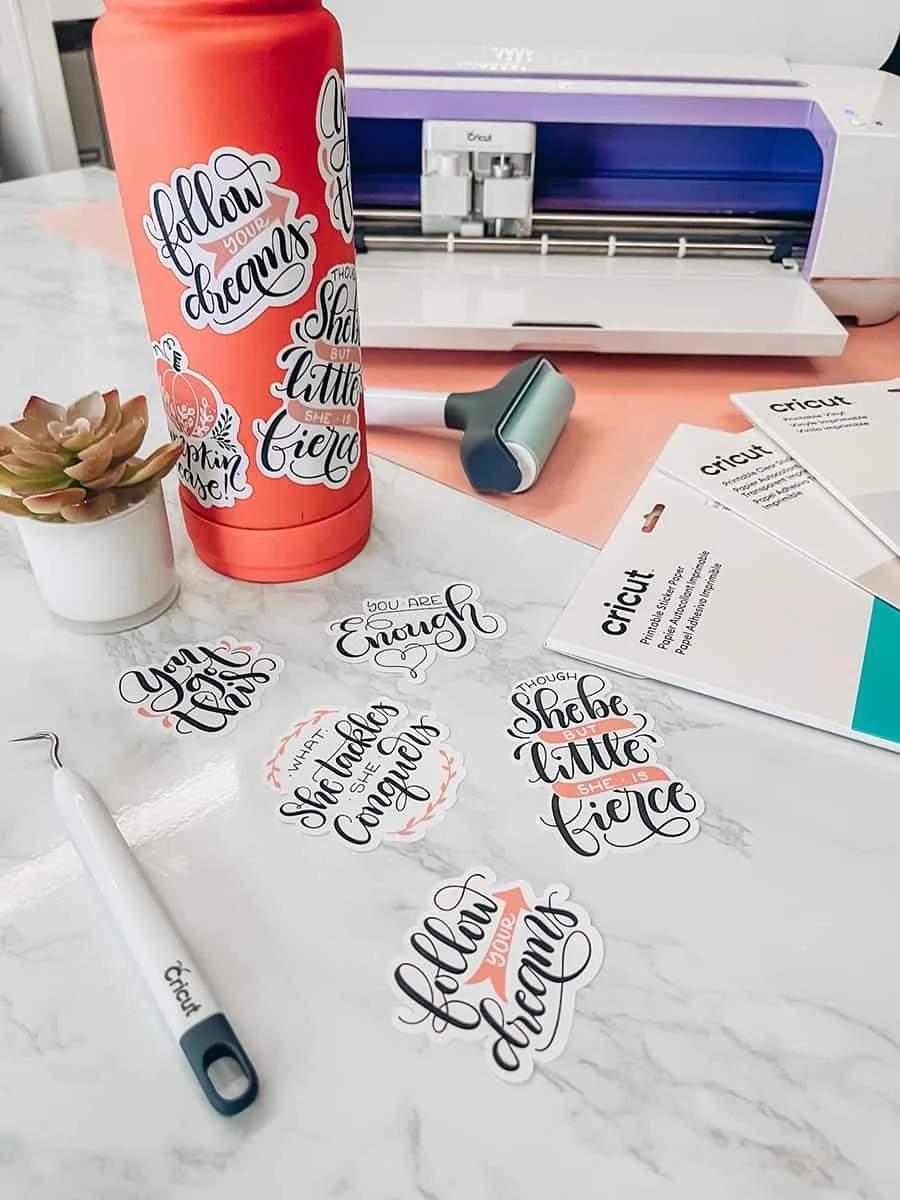
And you are DONE!!
I know that the design process took a bit longer than the actual printing and cutting, so that's why I wanted to share a project in Design Space with the files all done for you =]


I am so excited about how the stickers came out! I am planning to start to test laminating and adding holographic tops, so make sure to check the blog later on for the follow-up post!


Troubleshooting
Here I will cover the most common issues, if you are experiencing something not covered here, just let me know in the comments, and I'll do my best to research it for you and any other person that could run into the same issue.
Out of alignment
If you find that the cuts and the print portions of your stickers are not aligned correctly, please make sure you calibrate your machine for Print then Cut. Cricut has a very helpful article right here to guide you through the process.
Sensor not reading
If you are having issues with the sensors not reading the marked border, there are several things that you can try. My to-go thing to check is to not have direct sunlight, if you have glossy paper, try to add a matte piece of tape on top of the black border. For more troubleshooting, just check this article from the Cricut website.


I hope this post helps you understand the sticker-making process better! It is honestly such a fun and easy project, I hope you give it a try!
Joy
Sunday 29th of January 2012
Hello there, I have decided to close the comments on this post. I have added extra instruction and updated the tutorial & pattern post on Feb 20th 2012. So hopefully now it will be easier for all of you to follow. I have no extra instructions or images but what I am sharing there and I am unable to give personalized help with this project, as I stated on the tutorial this is not an easy or beginner project, so start with something smaller and easier, then once you have more experience upgrade to this teddy bear, Thank you for understanding! =]
Emily
Sunday 29th of January 2012
I wanna make like at least 30'' teddy bear for v-day. thinking about buying like 3 yrd of farbic.. do you think it would be enough?
Joy
Wednesday 22nd of February 2012
To be honest I am not sure, but 3 yards sound like a lot so if you have a lot of leftovers you can use them for something else =]
anon
Thursday 1st of December 2011
i'm a young teenaged guy and i'm going to attempt to make this for a girl i like... they look phenomenal! i hope i can make it half as well as the pictures depict. out of curiosity, though- how did you make the zipper?
Vicky
Monday 28th of November 2011
Can anyone tell me how to do the backpack bear please? Many Thanks Vicky
Joy
Tuesday 29th of November 2011
You can read my answer to Marg =]
Lisa
Wednesday 12th of October 2011
Hello! I just wanted to tell you your bears are so cute! I especially like the cream and pink bear. Thank you for the free pattern. I will be trying this out for my daughter. Can't wait to get started. Thanks again! :)